
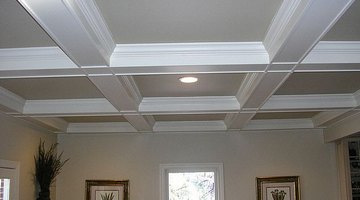
Coffered ceilings are gorgeous and have a tremendous impact on the look and feel of an interior space. They are an expression of luxury and refinement. However, these beautiful ceilings do not come with a luxury sized price tag. Building coffered ceilings is technically no different than framing a wall and finishing it with crown molding and trim.
Things You Will Need
-
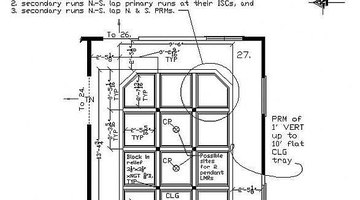
Make a ceiling plan and layout the coffer grid. Each recessed square area in the coffered ceiling grid should be the same dimension. The width and height of the box beams also has to be uniform. The grid can either start along the perimeter wall or be inset from the perimeter wall as shown in the ceiling plan on the left.
-
Insetting the coffered ceiling allows for the elegant 45 degree corners, also shown in the ceiling plan. Importantly, an inset coffered ceiling requires a soffit ceiling to be framed around the entire perimeter of the coffered ceiling. This allows the coffered ceiling to look recessed within the ceiling of the room.
-
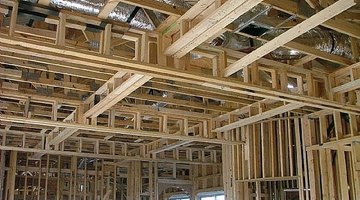
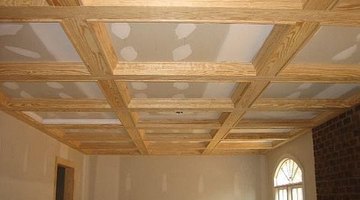
The entire coffered ceiling is only a series of faux (fake) beams, hence the framing aspect is very straight forward and relatively fast. A faux beam is just a long wooden box that will receive the finish wood cladding and trim. There are several ways to frame those boxes. Some carpenters build the faux beam boxes on the ground out of 1x material and hoist them into place, while others frame the faux beams directly to the ceiling joists. The latter method is pictured to the left.
-
Since you are likely not an experienced carpenter, frame your boxes piece by piece to the ceiling joists. Building them on the ground out of 1x's will be a frustrating process. Begin by nailing the top part of the beam to the ceiling joists using 2x6's, you can use two 2x4's if you want the beam larger. Determine your beam height and cut several cripple studs (intermediate vertical supports) of that length to get started. Install one cripple stud at each end of the beam, where the beam terminates into the wall.
-
Now, nail in a 2x6 that is the same length as the one you just installed to underside of the cripple studs nailed to the wall. This 2x6 creates the bottom of your beam. The 2x6 may sag down depending how long your faux beam span is. This will disappear as you fill in the void between the 2x6's with cripple studs at every 16" on center.
-
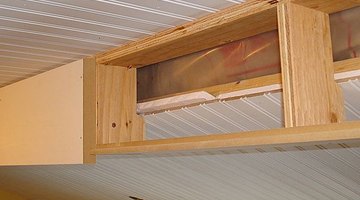
Clad the faux beam sides with 1x finish wood. Run the side pieces 1-1/8" past the bottom 2x6 or whatever lumber you framed with. This will allow for a 1/4" shadow line once you install your 3/4" finish wood piece to the bottom of the faux beam. Reference the picture to the left to see how the shadow line creates a classic looking coffered ceiling beam.
-
Install the crown molding. OK, this is project is best suited to do on the ground whether you are a green or experienced carpenter. Since all of your recessed coffer dimensions are the same, you can build replica crown molding boxes on table and install them with ease as a pre assembled unit. Do a mock up first. Miter cut each corner and glue the crown pieces together using clamps. Let it dry and then raise crown box into place and see how it fits. Once your set up is dialed in, fabricate all the crown boxes then tack them into the beams with a finish nail gun.
-
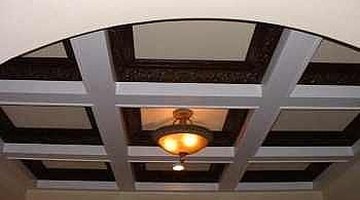
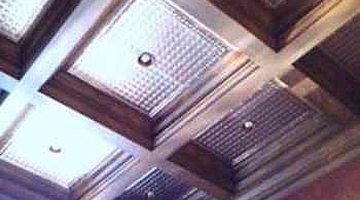
You have many finish options for the flat portion of the coffered ceiling between the crown molding. For a classic Victorian finish, you can add a tin ceiling inlay, which just glues into place and can be painted. You can add plaster ornamentations, which also essentially glue into place. Hanging chandeliers and ceiling fans look great installed within the center of a coffered ceiling, reference the above picture.
The Drip Cap
- Coffered ceilings are gorgeous and have a tremendous impact on the look and feel of an interior space.
- The width and height of the box beams also has to be uniform.
- A faux beam is just a long wooden box that will receive the finish wood cladding and trim.
- The latter method is pictured to the left.
- Begin by nailing the top part of the beam to the ceiling joists using 2x6's, you can use two 2x4's if you want the beam larger.
- Install the crown molding.
- You have many finish options for the flat portion of the coffered ceiling between the crown molding.
- You can add plaster ornamentations, which also essentially glue into place.