How to Nail Corrugated Barn Tin to a Ceiling
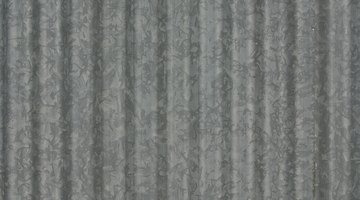
The ridge-and-furrow texture and burnished patina of corrugated barn-tin panels used frequently for barn siding and roofs can also enhance the decor of homes or commercial buildings. As a nailed-on, interior ceiling finish, corrugated barn tin best fits design themes with an austere, industrial/high-tech feel.

It is an excellent interior design element for creative businesses, like advertising agencies or Web design firms, or for certain types of residences, such as urban loft apartments.
Things You Will Need
- Ceiling rough-finished with plywood panels
- Corrugated barn tin panels of uniform size
- Sheet-metal nails
- Carpenter's chalk
- Tape measure
- Hammer or nail gun
- Sheet metal shears
- Crown molding (optional)
-
Choose your panels. Although classic barn tins have a pattern of curved ridges and furrows, corrugated metal panels are available in a variety of textures. For an industrial look, use new panels or select used panels in good condition with no visible oxidation. However, some designers seek out well-weathered panels salvaged from actual barn exteriors, for a rustic look.
-
Find and mark the center of your ceiling. First, measure the width of the ceiling and mark a chalk line on the plywood sub-finish at the halfway point. Then, measure to the half-way point lenghthwise and place a perpendicular chalk line. The point where the two lines cross is the center of the ceiling, with the lines forming a grid that divides the center into quadrants.
-
Place your first panel with one corner flush with the edges of one quadrant of your chalk line grid. The length of the ridges and furrows on the panels should run parallel to the long sides of the ceiling. Use sheet-metal nails to fasten the panel to the plywood, spacing the nails uniformly, no more than 12 inches apart. Repeat this step until you have placed panels in all four quadrants of the center. Align the edges of the panels carefully to ensure a uniform pattern of ridges and furrows.
-
Place additional panels, working from the center outward, until you have a margin of unfinished ceiling on all four sides with a width that is smaller than your steel panels.
-
Measure panels to fit the edges, then cut them to size. To help you keep the pattern of ridges and furrows uniform, place each cut on a side that will abut the wall. Nail the edge panels in place.
Tip
Consider finishing the project off with crown molding because it is difficult to achieve a perfectly flush edge when cutting panels to fit the edges.
Warning
Wear eye protection for this project, because small metal fragments may be released as you cut and nail the panels.
The Drip Cap
- The ridge-and-furrow texture and burnished patina of corrugated barn-tin panels used frequently for barn siding and roofs can also enhance the decor of homes or commercial buildings.
- Use sheet-metal nails to fasten the panel to the plywood, spacing the nails uniformly, no more than 12 inches apart.
- To help you keep the pattern of ridges and furrows uniform, place each cut on a side that will abut the wall.
References
Writer Bio
William Souplis has been writing professionally since 1991. His work has appeared in publications ranging from daily newspapers, including "The Pocono Record," to specialized industry and professional publications such as "Information Today." Souplis earned a Master of Arts in English from the University of Maryland.
Photo Credits
- Jupiterimages/Photos.com/Getty Images
- Jupiterimages/Photos.com/Getty Images
More Articles


