
How to Box in a Steel Beam in a Basement

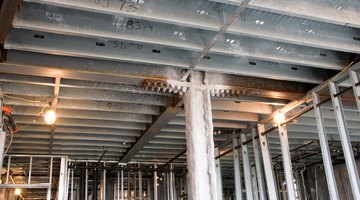
Steel beams are a fact of life in many basements. Stretching from side to side, similar to and among the floor joists or spanning from the floor to ceiling like a fireman's pole, steel beams provide vital structural support. The problem is, steel beams are ugly. You can't remove them safely nor can you ignore them.
You can, however, enclose them in a frame -- a long, narrow box that spans the entire distance. Covered with your choice of materials, you can customize your basement's look.
Things You Will Need
- Tape measure
- 2-by-4-inch boards
- Circular saw
- Straightedge
- 8d nails
- Hammer
- Concrete screws
- Drill
- Construction adhesive
- 20d nails
- Plywood, drywall or paneling
Boxing in Ceiling Beams
-
Measure and record the length of the steel ceiling beam, from one end to the other. This is the length of the frame required. You may need to build more than one frame if the length is longer than your 2-by-4-inch boards.
-
Determine the depth of the steel ceiling beam, measuring from either the bottom of the ceiling joists or the finished ceiling surface. For instance, a steel beam that extends past the joists 8 inches is recorded as 8 inches in depth.
-
Find the width of the steel ceiling beam. Think of this as the diameter to avoid confusion. Record the measurement; creating a little rough sketch with the length, depth and width marked may help you envision the project.
-
Cut 4 boards the depth of the steel beam -- 2 boards for each end of the frame. Make 2 additional short boards that measure the width of the beam -- 1 board for either end of the box. Mark each board with either a "D" or a "W."
-
Lay two 2-by-4-inch boards, cut to the appropriate length, flat on your work surface. Set the "W" board on top. Align the board so it is flush with the ends, one on either side of the "W" board. Nail through the "W" board into the 2-by-4 with two 8d nails per side. Repeat on the opposite end.
-
Flip the frame over so the "W" board rests against the work surface, with the 2-by-4s spanning between and laying on each. This is your steel beam box frame bottom.
-
Hold a "D" board up to the frame, on end with the wide side of the board facing the side of the 2-by-4. Align it flush with the end of the 2-by-4 and "W" board. Secure with two 8d nails driven through the board into the side of the 2-by-4 and the end of the "W" board.
-
Repeat with each "D" board -- two on one end and two on the opposite. When complete, you have a frame that is open on one end (the top) and boxed in on the bottom and sides. Build additional frames, if needed, to span the entire length of the beam.
-
Lift the steel beam box frame into place, fitting the frame over the beam to encompass it. Secure the frame to the wall on either end with concrete screws, using a drill to drive the screw through the wood and into the wall. If the box is comprised of more than one frame, nail them together with nails before attaching to the walls.
-
Cover the bottom face and both sides of the steel beam frame with either drywall, plywood or paneling. Finish as preferred.
Boxing in Floor-to-Ceiling Beams
-
Measure the steel beam height, from floor to ceiling. Subtract 3 inches from the dimension. This is the length you will need for your long 2-by-4 boards, which will rest on top of the end pieces, each 1 1/2 inches thick. Sketch a diagram if it helps you envision the construction.
-
Find the measurements of the beam, both the width when facing it and the depth back from you. A square steel beam will measure the same for both. Subtract 7 inches from the width measurement to obtain the board size necessary for that side. For example, a 9-inch-wide beam requires a 2-inch-long width board.
-
Cut 4 depth boards and 4 width boards. Label each with either a "W" or a "D."
-
Lay a "D" board, wide face up, across the end of a 2-by-4 board. Align the boards so that the 2-by-4 is flush with the right corner of one end and the wide face of the 2-by-4 facing out. Nail twice through the "D" board into the 2-by-4. Repeat with another 2-by-4 on the opposite end of the "D" board.
-
Nail two additional 2-by-4-inch boards to the remaining "D" board. Align the 2-by-4s with the left edge of the "D" board before securing.
-
Attach the remaining "D" boards to the opposite ends of the 2-by-4 boards. This completes the sides of the steel beam box frame.
-
Set each box frame side in place on either side of the steel beam. Allow for the width board between the sides before securing. For a 9-inch-wide box frame, for example, leave 2 inches between the box frame sides.
-
Drive anchors through the depth boards into the ceiling above and the floor below on either end of the 2-by-4 boards. Use concrete screws as necessary. Attach with a couple of anchors for each side.
-
Spread a bead of construction adhesive on the ends of the "W" boards. Insert the width board between the box frame sides, tapping into place with a hammer if snug. Reinforce by toenailing nails through the "W" board into the "D" boards or using 20d nails to drive through the "D" boards into the "W" board.
-
Add additional boards between the 2-by-4 boards half way up the height to reinforce the frame covering, especially when using drywall or paneling. Use the "D" and "W" widths, depending on the side involved.
-
Cover the entire frame with either plywood, paneling or drywall. Finish as appropriate.

Tip
Add additional width boards periodically for large expanses, especially if covering the steel beam box frame with paneling or drywall. Attach the boards every 5 or 6 feet, nailing to the underneath of the 2-by-4 boards. Use narrower boards, such as 1-by-2-inch boards, for narrower beams. Remember to compensate for the actual board dimension if placing inside the frame, such as a "W" board.
The Drip Cap
- Steel beams are a fact of life in many basements.
- Stretching from side to side, similar to and among the floor joists or spanning from the floor to ceiling like a fireman's pole, steel beams provide vital structural support.
- The problem is, steel beams are ugly.
- For instance, a steel beam that extends past the joists 8 inches is recorded as 8 inches in depth.
- Cut 4 boards the depth of the steel beam -- 2 boards for each end of the frame.
- Repeat on the opposite end.
- This is your steel beam box frame bottom.
- Hold a "D" board up to the frame, on end with the wide side of the board facing the side of the 2-by-4.
- Lift the steel beam box frame into place, fitting the frame over the beam to encompass it.
- Secure the frame to the wall on either end with concrete screws, using a drill to drive the screw through the wood and into the wall.
- This is the length you will need for your long 2-by-4 boards, which will rest on top of the end pieces, each 1 1/2 inches thick.
- Subtract 7 inches from the width measurement to obtain the board size necessary for that side.
- Set each box frame side in place on either side of the steel beam.
References
Resources
Writer Bio
Karie Fay earned a Bachelor of Science in psychology with a minor in law from the University of Arkansas at Monticello. After growing up in construction and with more than 30 years in the field, she believes a girl can swing a hammer with the best of them. She enjoys "green" or innovative solutions and unusual construction.
Photo Credits
- Jupiterimages/Photos.com/Getty Images
- Jupiterimages/Photos.com/Getty Images
- Jupiterimages/Creatas/Getty Images
More Articles