How to Replace the Outside Cover for a Dryer Vent
A properly functioning outside dryer vent cover is very important for any home's operation. Without it, lint and warm moist air may back up into the home, which can cause mold or other damage inside or to the structure of the house.

A properly functioning outside dryer vent cover is very important for any home's operation. Without it, lint and warm moist air may back up into the home, which can cause mold or other damage inside or to the structure of the house. Replacing a vent cover is simple, thanks to prefabricated units with an all-in-one design. These simply need to be mounted to the house through a hole and attached to the dryer duct inside.
Things You Will Need
- Utility knife
- Putty knife
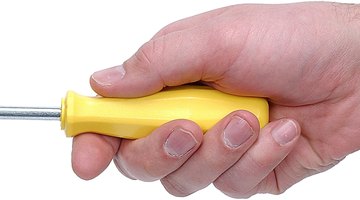
- Screwdriver
- New dryer vent cover
- Insulation or weather stripping
- Silicone caulk
-
Trim the caulk seal around the dryer vent cover and against the side of the house. Don’t press too hard, or you may cut into the exterior wall material. Peel away the excess caulk remaining on the house with a small putty knife. Remove as much caulk as possible.
-
Unscrew the the long mounting screws holding the vent cover housing in place. Avoid damaging the screw holes by unscrewing each screw a little, moving on to the next, and then repeating until done. This will help keep the holes in line and make it more likely that you can reuse those holes.
-
Pull the vent cover housing out through the hole. It may have settled in place, so it may require a slight tug to dislodge. Pull it out straight, to leave the hole undamaged and any insulation in place.
-
Check the hole for any problems. Look for any rotting, lint buildup or other damage that may make connection of the new vent cover a problem.
-
Slide the new vent cover into the hole, but be careful not to bend the metal ducting connected to it. Apply any insulation or weather stripping, and then push the new unit flush against the house.
-
Insert the screws into the existing holes from the previous vent cover. Tighten them down evenly, just as you had taken the screws out evenly. This will ensure that the unit is square against the house. Place a bead of caulk around the outer edge where the unit touches the house to help keep out insects and the elements.
Tip
Use clear caulk to seal the area around the vent to avoid making the caulk easily visible. If the holes for the old unit are not perfect, add washers between the unit and the house to give more support.
Warning
Be careful when trimming the old caulk, it is very easy for a hand to slip while cutting.
Use gloves when handling the dryer vent cover assembly. The integrated metal ducting on the backside has sharp edges.
The Drip Cap
- A properly functioning outside dryer vent cover is very important for any home's operation.
- Trim the caulk seal around the dryer vent cover and against the side of the house.
- Avoid damaging the screw holes by unscrewing each screw a little, moving on to the next, and then repeating until done.
- It may have settled in place, so it may require a slight tug to dislodge.
- Insert the screws into the existing holes from the previous vent cover.
References
- “DIY Guide to Appliances: Installing & Maintaining Your Major Appliances;” Steve Willson; 2008
Photo Credits
- Zedcor Wholly Owned/PhotoObjects.net/Getty Images
- Zedcor Wholly Owned/PhotoObjects.net/Getty Images
More Articles


