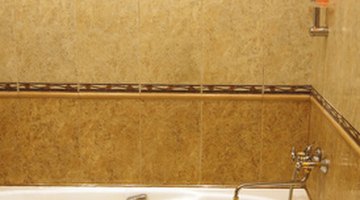
Shower Wall Repair
Your shower wall is damaged or falling apart and needs to be fixed. Repairing a shower wall is not difficult, but the amount of actual repair needed will be more extensive than the visible damage that you can see. Tiled shower walls are the most common walls that fail.

However, fiberglass enclosures can also be damaged. Tile shower wall failure is either due to improper installation of materials, or installing inferior materials. Fiberglass wall damage is most often caused by some kind of external force that has been applied to the fiberglass surface.
Fiberglass Enclosure Repair
You can repair damaged fiberglass tub and shower enclosures, but the repair will always be visible. Remove and replace the entire unit if the appearance of the fiberglass surface is important to you. Otherwise, you can obtain fiberglass-patching kits from hardware stores and boat repair suppliers. It is not difficult to repair fiberglass, but it is difficult, if not impossible, to match the exact color of the tub or shower enclosure. Use a two-part epoxy resin over the repair site, and attach fiberglass material over the resin to patch over the damage. Coat the patch with epoxy resin that has been colorized with a pigment.
Tile Wall Repair
You have a choice. Replace the walls in the shower area, or patch the problem area and put off replacement. If damage is visible to the tiles in one area of the shower, it is certain that other areas of the shower walls are not far behind and will ultimately fail.
Damage to shower walls most often occurs around the tub or shower pan lip, where water wicks up the wall behind the tile. Improper caulking between the tub and the tile is the most common reason. Patch the damaged area by carefully removing the tiles from the wall until you find undamaged drywall. Scrape the grout from between the tiles, and remove the tiles by sliding a putty knife under one edge of the tile and prying it up. Clean the tiles before reusing them. Boil the tiles in water and remove any adhesive material from the back of the tile while they are still hot.
Scrape the grout out from between the tiles of the row of tiles adjacent to the repair area. Remove the damaged drywall. Treat the wood framing for dry rot and mold before installing new underlayment. Install new underlayment (the best option is cement fiber board) and tape the seams with the product appropriate for the underlayment you choose to use. Reinstall the used, cleaned tiles over the patch, ensuring proper alignment with the existing tiles on the wall, and re-grout.
References
Resources
Writer Bio
Fred Howe, a writer since 2009, holds a B.S. in sociology from George Fox University. A retired correctional officer from Pelican Bay State Prison in California, Howe has also worked as a sous chef and catering manager.
Photo Credits
- bathtroom image by vnlit from Fotolia.com
- bathtroom image by vnlit from Fotolia.com
More Articles


