
How to Sharpen Tiller Tine Blades

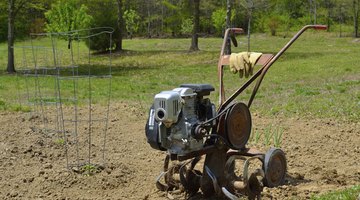
Rototiller tines cut through tough soil and slice through thick roots to loosen the soil for grading or planting. All this rough work slowly dulls the tiller tines, forcing the tiller to rely more on the turning force the engine generates rather than the two working in unison.
Sharpen the tiller tine blades at the start of each garden season to keep the tiller working efficiently. The tines are rather thick and do not require as sharp an edge as pruning blades or shovel edges.
Things You Will Need
- Combination wrench or ratchet wrench (optional)
- Vice (optional)
- Scissors
- Nylon scrub brush
- Mild detergent
- Mill file
- Machine oil or motor oil
Tip
Rotary grinding tools work efficiently for grinding metal to sharpen tiller tine blades, removing the metal particles much faster than a hand-operated mill file does. Only attempt sharpening with an electric grinding tool if you have experience with that tool, or you could grind the metal too quickly or lose control. Just as with a hand file, you must maintain the same angle across the entire blade.
Warning
Read your user's manual carefully. Although sharpening the tines can make the tiller operate better, doing so may void the warranty on the tiller model.
-
Remove the bolts that hold the tines on large tillers, and slide the tines off the axle. Lock the tines in a vice with the honed -- but dull -- edge facing your body. The tines require frequent repositioning to access each blade. For small tillers or front-tined tillers, simply turn the tiller on its side with the gas tank facing upward and the tines in air.
-
Cut off any roots or plant material wrapped around the tiller tines. Brush away dirt and debris with a nylon scrub brush. Wash the tines with mild detergent to remove any remaining soil. Soil left on the blades can scratch the metal and restrict proper sharpening.
-
Place a mill file against the edge of the tiller tine, in the bend. Align the file with the existing angle of the honed edge. When the original bevel edge is so dull that it's nearly blunt, fix the angle at approximately 60 to 70 degrees. This angle sharpens the edge without making a razor-sharp edge as would a 45-degree-angle sharpening job. A 12- to 14-inch mill file, also called a bastard file, works well for most tiller tine sizes, but you might prefer a larger file for very large tiller tines. A longer file means a larger filing surface, which requires fewer passes with the file to complete the same job.
-
Push the file firmly forward, working from tip to base, while applying firm pressure to file off some of the blade metal. Reposition the file immediately beside the first position on the tine and push forward to file the metal. Repeat this process until you reach the opposite end of the tine. Return to the starting position and make another pass with the file, repeating to the opposite end of the tine. Make additional passes with the mill file until the tine is sharp -- the edge need not be as sharp as a knife blade or mower blades. Reposition the tines on the vice to file the remaining blades.
-
Rub each filed edge with machine oil or motor oil to prevent rust. Reattach the tines to the rototiller.
The Drip Cap
- Rototiller tines cut through tough soil and slice through thick roots to loosen the soil for grading or planting.
- Remove the bolts that hold the tines on large tillers, and slide the tines off the axle.
- Brush away dirt and debris with a nylon scrub brush.
- A 12- to 14-inch mill file, also called a bastard file, works well for most tiller tine sizes, but you might prefer a larger file for very large tiller tines.
- Reposition the file immediately beside the first position on the tine and push forward to file the metal.
- Make additional passes with the mill file until the tine is sharp -- the edge need not be as sharp as a knife blade or mower blades.
References
Writer Bio
A former cake decorator and competitive horticulturist, Amelia Allonsy is most at home in the kitchen or with her hands in the dirt. She received her Bachelor's degree from West Virginia University. Her work has been published in the San Francisco Chronicle and on other websites.
Photo Credits
- HildeAnna/iStock/Getty Images
- HildeAnna/iStock/Getty Images
More Articles