
How to Lay Roofing Felt on a Hip Roof

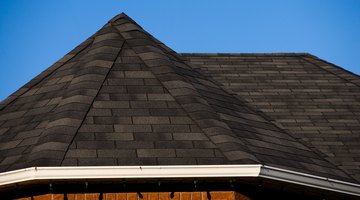
Hip roofs do not have gable ends, but, instead, they feature sides that all slope downward and must be shingled. A hip roof may be virtually square, sloping from one main roof point downward on four equal sides, or it may have an extended roof ridge and additional hips designed by the architect.
Once you get the hang of installing roofing felt over the hips, it’s not much more involved than installing the felt on a gable roof. The basic idea is to install the asphalt-treated felt in such a manner that the roof will shed water.
Things You Will Need
- Hammer stapler
- Hammer staples
- Utility knife with hook blade
-
Start at the bottom of one side of the roof at the right or left edge. Roofing felt comes in rolls that feature pre-marked lines 2 to 3 inches from the top and bottom edges. Unroll the felt so that the lines are facing upward.
-
Position the first row of roofing felt flush on the bottom with the edge of the gutter apron. The bottom end of the felt should extend about 8 inches past the hip on the side. Leave the excess flap of felt for now.
-
Insert staples with a hammer stapler 12 inches apart along the top and bottom edges of the felt paper as you roll it out along the roof. Adjust the bottom of the felt, if necessary, to keep it flush with the gutter apron.
-
Continue rolling out the felt until you reach the roof hip on the other end. Cut the felt in a straight line, so that the bottom edge of the felt extends 8 inches past the roof hip. Move the roll of felt, which you’ve now severed from the strip on the roof up and out of your way.
-
Fold the excess flap of roofing felt over the hip, and staple the felt in place along the hip, 4 to 5 inches from the edge of the hip. There will be additional excess at the top of the strip since you’re folding it over a sloped hip ridge.
-
Fit a utility knife with a hook blade, and cut the excess in a line from top to bottom, leaving about 8 inches of overlap.
-
Repeat the stapling and cutting process on the other end where you started the row before installing the second row of felt.
-
Position the second row of felt so that it overlaps the first row. Now, you’ll use the top line on the first row as a guide for installing the second row. Once again, leave 8 inches of excess at the side of the bottom edge of the felt.
-
Roll out and install the second row just as you did the first. You’ll install every subsequent row in the same manner.
-
Install the roofing felt on all roof sides, extending it over the ridge of the roof and overlapping 8 inches there just as you did on the sides.
Tip
The roof ridge is the horizontal top edge, which may or may not be present on a hip roof. The hips are the sloping side edges of the roof.
Warning
Once you begin installing felt on subsequent sides, the edges will overlap the felt you already installed. It’s essential that you use only a hook blade in the utility knife so you don’t cut through the previously installed felt; this can lead to water leaks.
The Drip Cap
- Hip roofs do not have gable ends, but, instead, they feature sides that all slope downward and must be shingled.
- Once you get the hang of installing roofing felt over the hips, it’s not much more involved than installing the felt on a gable roof.
- Adjust the bottom of the felt, if necessary, to keep it flush with the gutter apron.
- Cut the felt in a straight line, so that the bottom edge of the felt extends 8 inches past the roof hip.
- Roll out and install the second row just as you did the first.
Writer Bio
Glenda Taylor is a contractor and a full-time writer specializing in construction writing. She also enjoys writing business and finance, food and drink and pet-related articles. Her education includes marketing and a bachelor's degree in journalism from the University of Kansas.
Photo Credits
- Jupiterimages/Photos.com/Getty Images
- Jupiterimages/Photos.com/Getty Images
More Articles