
DIY Wood Pedestal

Pictures, plants and family heirlooms find a resting place on pedestals. A pedestal creates a focal point, bringing the object to eye level. Making a pedestal may seem difficult until you approach it as a puzzle; the trick is to fit the pieces together in proper order.
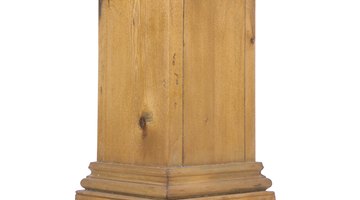
The pedestal for this project is 36 inches high, but you can alter the dimensions to fit any height or width.
Things You Will Need
- 1-by-3-inch lumber
- 1-by-2-inch lumber
- 3-by-6-foot plywood sheet 3/4-inch thick
- Measuring tape
- Saw
- Screwdriver
- Screws
- Miter box
- Biscuit joiner
- Wood biscuits
- Wood glue
- Nails
- Hammer
- Sandpaper
- Stain
- Paintbrush
The Cuts
-
Cut four pieces of lumber 1 by 1 1/2 by 33 inches; mark these pieces “A.” Cut four pieces of lumber 1-by-5/8-by-33 inches; mark these pieces “B.” Cut eight 1-by-3-by-3 5/8-inch pieces; mark these pieces “C.”
-
Cut four plywood pieces 4 1/2-by-28-inches; mark these pieces “D.” Cut two plywood pieces 11-by-11 inches; mark these pieces “E.” Cut one plywood piece 8 1/4-by-8 1/2 -inch; mark the piece “F.”
-
Cut two pieces of the 1-by-2-inch lumber 9 3/8 inch long; mark these pieces “G.” Cut two pieces of 1-by-2-inch lumber 7 7/8 inch long; mark these pieces “H.”
-
Group all the pieces together by letter.
Assembly
-
Lay two “A” pieces parallel with the wide sides horizontal. Make the ends flush. Lay two of the “C” pieces with their ends against the sides of the longer pieces. Make the wide edge of the “C” pieces horizontal. You should have a rectangular box.
-
Make a joint in the sides of the "A" pieces and the ends of the "C" pieces with the biscuit joiner. Insert the biscuit joiner into the pieces to form a crescent cutout for the biscuit.
-
Insert a biscuit at each inside corner. Nail the pieces together. Construct another frame from the remaining “A” pieces, two “C” pieces and four biscuits.
-
Lay two “B” pieces parallel with the wider edges horizontal. Make the ends flush. Set the ends of two “C” pieces against the sides of the “B” pieces with the wider edges horizontal. Form a rectangular frame.
-
Make a joint in the sides of the "B" pieces and the ends of the "C" pieces with the biscuit joiner. Insert the biscuit joiner into the pieces to form a crescent cutout for the biscuit.
-
Insert a biscuit at each interior corner. Nail the parts together. Construct another frame from the remaining “B”, “C” pieces and biscuits.
-
Apply glue to one side of a frame. Rest a “D” piece on the frame matching the lengths. Center the panel over the frame. Press down along the edges for a good seal.
-
Nail the corners of the panel to the frame using a pair of nails equidistant from the corners along each side of the panel. Repeat this step with the other frames and “D” pieces.
-
Apply a bead of glue to the open side of a wide and thin frame. Set the wider frame face against the side of the smaller frame with the ends flush. The panels will line up. Hammer four nails through the inside edge of the small frame into the end of the large frame. Set the nails equidistant with one per corner and two in the middle. Repeat this step for the other two frames so you have assembled two corners.
-
Set the combined “E” pieces on the column. Center the pedestal top. Screw the top onto the column. Place a screw at each corner and two screws equidistant from the corners per side.
-
Use the miter box to cut 45-degree angles at the top and bottom of “G” and “H” pieces; the angles should face the same direction.
-
Screw pieces “G” and “H” around the base of the column on the appropriate sides to provide greater stability. Use a screw at each end and one in the center of each piece.
-
Flip the pedestal upside down. Center piece “F” over the opening and screw it onto the pedestal base. Place a screw at each corner and two screws equidistant per side from each corner. You will have four screws per side.
-
Sand rough edges and corners. Paint or stain the pedestal as desired.
The Drip Cap
- Pictures, plants and family heirlooms find a resting place on pedestals.
- The pedestal for this project is 36 inches high, but you can alter the dimensions to fit any height or width.
- Make the wide edge of the “C” pieces horizontal.
- You should have a rectangular box.
- Make a joint in the sides of the "A" pieces and the ends of the "C" pieces with the biscuit joiner.
- Insert the biscuit joiner into the pieces to form a crescent cutout for the biscuit.
- Hammer four nails through the inside edge of the small frame into the end of the large frame.
- Screw the top onto the column.
- Use a screw at each end and one in the center of each piece.
Photo Credits
- Hemera Technologies/PhotoObjects.net/Getty Images
- Hemera Technologies/PhotoObjects.net/Getty Images
More Articles