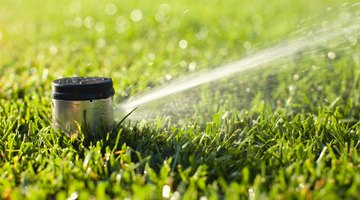
How to Shut Off a Sprinkler Head
An automatic sprinkler system takes the planning out of watering your lawn in addition to relieving you of moving sprinklers and timing when they run. Eventually, however, the sprinkler system may begin to spring leaks caused by freeze-thaw cycles or the chemistry of its underground environment.

Sprinkler heads often show their age first, especially the kind of heads that pop up or oscillate. Repairing or replacing a sprinkler head is typically simple, but the first task is to isolate the passive device from the rest of the sprinkler system and shut it off.
-
Turn off the water at the main shut-off valve near the automatic sprinkler system's water source. The main shut-off valve is typically near an outdoor spigot and should have a switch or wheel on top that allows it to be operated easily manually.
-
Locate the zone valve that controls the target sprinkler head's group of sprinklers. Zone valves are located in wells in the yard and covered with metal or plastic plates. A sprinkler system has multiple zones, and so the zone valve nearest the target sprinkler head probably controls it.
-
Examine the zone valve's side for a manual control lever. Flip that lever to the "Off" position if the lever is present.
-
Disengage the solenoid if no manual control lever is present. The solenoid is in a tube that rises above the valve casing on the outflow side of the valve. Look for labels on the top of the solenoid chamber for specific directions to disengage the solenoid. Typically, though, disengaging it requires rotating the unit one-quarter to one-half turn counterclockwise.
-
Dig out the soil surrounding the sprinkler head. Unscrew the sprinkler head to repair or replace it. Cap the sprinkler head stub if you wish to remove the sprinkler head position from the sprinkler system, tightening the cap firmly with pliers cushioned with a piece of cloth. Do not overtighten plastic parts.
-
Open the sprinkler line in the reverse order that you closed it.
Things You Will Need
- Shovel or trowel
- Piece of cloth
- Pliers
Tip
Test a sprinkler head by opening and closing only the zone valve. Flush a line before reassembling a sprinkler in it by running the system through an open sprinkler head. Even water straight out of the tap might contain sand or dirt that can clog fine sprinkler apertures, causing blockages, or hold valve diaphragms open, causing leaks. Sprinkler head designs vary by type of head. Most sprinkler heads have a part near the aperture where the water exits the head, and that part can be removed to flush the head. Check your irrigation system's installation or maintenance instructions for those details.
Warning
Never force a solenoid beyond the one-quarter to one-half turn it takes to open or close the valve. Tighten plastic connections with only your fingers to avoid stripping threads.
References
Writer Bio
An avid perennial gardener and old house owner, Laura Reynolds has had careers in teaching and juvenile justice. A retired municipal judgem Reynolds holds a degree in communications from Northern Illinois University. Her six children and stepchildren served as subjects of editorials during her tenure as a local newspaper editor.
Photo Credits
- Willard/iStock/Getty Images
- Willard/iStock/Getty Images
More Articles


