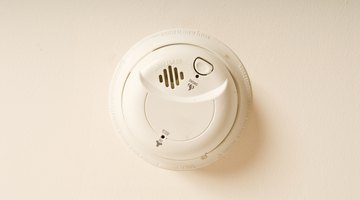
Can I Paint a Smoke Detector?
Smoke detectors are a vital safety necessity in any building and are required by most local building and fire codes, but do they have to be so unattractive? Not if you paint their covers to match your decor.

Gathering Your Smoke Detector Covers
A standard white cover stands out like a sore thumb on an otherwise elegant ceiling that has been painted a soft golden hue or deep dark red. Determine which ceilings in your house you would like to paint, then gather a step stool or small ladder to reach the detectors you wish to paint as well. To remove the smoke detector's cover, simply turn it counterclockwise. You will see inside a battery compartment that holds typical AA or 9 volt batteries. This is also a good time to replace any existing batteries that might need replacing. You can check your battery's performance by pressing the "TEST" button. If your battery is charged, it will cause the detector to alarm.
Preparing The Covers
The easiest, quickest way to prepare your covers for painting, is to buy a spray can of paint primer for plastic. This can be found at any hardware or home improvement store and costs about $4. Spread out a few sheets of old newspaper, then cover with wax paper or plastic wrap. Place the covers in the center. Shake the primer can as directed, then holding the can approximately 8 to 10 inches away, spray the covers (right side up) in a slow, back-and-forth motion. Do not get to close to the cover or stop moving the spray can as this can cause puddling of the primer. Do not over spray. Be patient. Remember; two light coats of primer, being allowed to fully dry in between, is a lot better than one thick coat that will look clumpy and take a long time to dry completely. Repeat for each cover you wish to paint.
Painting The Covers
Determine your desired ceiling paint, or the paint color of the area where the smoke alarm is installed. Matte or eggshell paint finishes are the best choices for ceilings. "Decorative Paint & Faux Finishes" by the Editors of Sunset Magazine, states that intense colors add drama to your decor and determine the rooms visual temperature. A dark color will make the room feel smaller and more closed in, which is great for a dining room or den, whereas lighter colors will seem airy and open the room up. A slight hint of color on the ceiling or walls can make a big difference in the way a room feels and how it accents your decor. To paint the smoke detector covers, buy a small trim roller. Once the primer has completely dried on your covers, you are ready to paint them. Dip the trim roller in the paint pan, then apply it to the covers. Apply more pressure in areas of depression, sides & slits to make sure the paint gets in all the cracks. Then reapply paint on entire cover surface. Do not over paint. If you get an area that seems to be too heavy or too light, simply reroll that area. You can also put on a plastic glove and cup your fingers inside the cover to get a better grip on it, which will make painting it easier. Allow to dry completely before reinstalling the covers, by turning them clockwise. Voila! No more ugly smoke detectors.
The Drip Cap
- Smoke detectors are a vital safety necessity in any building and are required by most local building and fire codes, but do they have to be so unattractive? Not if you paint their covers to match your decor.
- This is also a good time to replace any existing batteries that might need replacing.
- Remember; two light coats of primer, being allowed to fully dry in between, is a lot better than one thick coat that will look clumpy and take a long time to dry completely.
- A slight hint of color on the ceiling or walls can make a big difference in the way a room feels and how it accents your decor.
- Apply more pressure in areas of depression, sides & slits to make sure the paint gets in all the cracks.
- No more ugly smoke detectors.
References
- "Complete Do-it-yourself Manual", Readers Digest Assoc., 2005
- "Decorative Paint & Faux Finishes" Sunset Editors, pgs 35 & 37
Photo Credits
- Jupiterimages/Photos.com/Getty Images
- Jupiterimages/Photos.com/Getty Images
More Articles


