How to Use Burlap on Walls
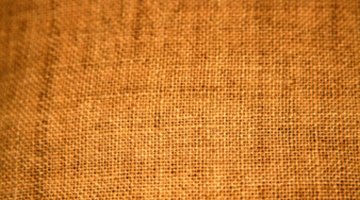
Burlap has a warm, pleasant color making it an interesting addition to any home. You can make simple things like draperies from burlap, but if you really want to enjoy the burlap, mount it on your walls. Burlap makes a wall covering that insulates a room and creates pleasant acoustic vibrations.

Installing burlap on your walls is a simple process that may take less than an evening if you work at a steady pace.
Things You Will Need
- Measuring tape
- Scissors
- Burlap
- Cellulose glue
- Paint roller
Tip
If you want to hang burlap, but you don’t want it to be a permanent addition to your walls, staple it to the wall instead of gluing it.
-
Cut the burlap fabric into strips that are long enough to reach from your roof to your floor. The strips must be 2 feet wide unless they rest against a corner, in which case you can trim them down to fit between the closest strip of burlap and the corner of the wall.
-
Coat two strips of the burlap in cellulose glue and let them sit for three minutes. This gives the glue time to bond to the fibers of the burlap, allowing it to stick thoroughly. Anytime you apply one strip of burlap to the wall, soak another in glue so you always have at least two strips ready to stick against the wall at all times.
-
Place the bottom end of the burlap strip against the bottom of the wall. Place a long-handled paint roller against the front of the burlap and slowly roll it up, sticking the burlap to the wall as you roll. Have an assistant hold the top end of the burlap as you roll it up.
-
Smooth the burlap strips out once you have them all stuck to the wall. It is important to smooth the wrinkles out as soon as you can or they may dry in place.
-
Trim down the strips of burlap (before you apply the glue) to fit between the closest burlap strip and any windows, doors or corners in the wall. When it comes to windows and doors, leave the area above and below the trim empty until you finish applying all the longer strips of burlap.
-
Measure the vertical distance between the floor and the window trim under each of your windows. Cut the burlap to the appropriate length to reach between the frame and the floor. Cut the strips 2 feet wide unless the distance between two strips is shorter than two feet.
-
Stick the burlap strips to the wall near the floor. Smooth it up along the wall using your hand, avoiding wrinkles as you work.
-
Measure the distance between the top of the window and door frames and the ceiling. Cut more 2 feet wide burlap strips at the appropriate length to fit between the frames and the ceiling. Apply these strips the same way you applied the rest of the burlap.
-
Trim the top and bottom edges of the burlap to keep it from fraying. Use sharp scissors to trim them or you may end up fraying them further.
The Drip Cap
- Burlap has a warm, pleasant color making it an interesting addition to any home.
- Cut the burlap fabric into strips that are long enough to reach from your roof to your floor.
- Place a long-handled paint roller against the front of the burlap and slowly roll it up, sticking the burlap to the wall as you roll.
- Measure the vertical distance between the floor and the window trim under each of your windows.
- Cut the strips 2 feet wide unless the distance between two strips is shorter than two feet.
- Apply these strips the same way you applied the rest of the burlap.
References
Writer Bio
Shae Hazelton is a professional writer whose articles are published on various websites. Her topics of expertise include art history, auto repair, computer science, journalism, home economics, woodworking, financial management, medical pathology and creative crafts. Hazelton is working on her own novel and comic strip while she works as a part-time writer and full time Medical Coding student.
Photo Credits
- Jupiterimages/Photos.com/Getty Images
- Jupiterimages/Photos.com/Getty Images
More Articles


