


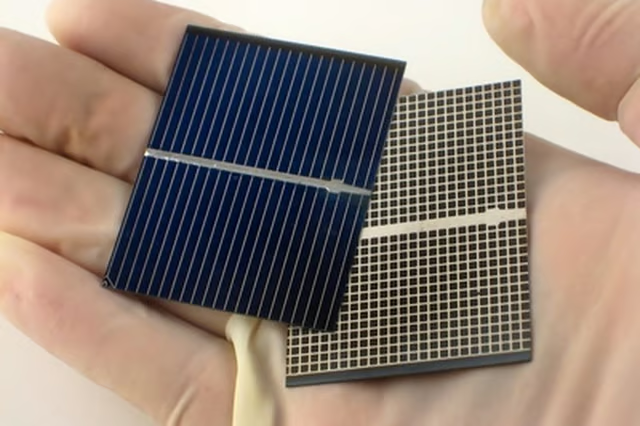
They require no fuel, and because they have no moving parts, they need very little in the way of repair and maintenance. The only cost associated with solar panels is the up-front purchase cost. Even this can be reduced by making your own solar panels at home.
Things You Will Need
-
Calculate the number of solar cells you will need to make your solar panel. Different cells provide different voltages. Divide the voltage you want your panel to produce by the voltage rating of your solar cells. This will give you the number of cells you need to produce 12 volts. Add a couple volts’ worth of cells to this number to eliminate the danger of backcharging, which can damage your solar panel.
-
Cut the plywood into a size just large enough to hold all the cells you need for your panel. Glue the narrow wooden strips all around the perimeter of the plywood you have cut. After your cell is assembled, these will hold up the Plexiglas cover to protect your panel from damage. Leave a small gap between two of the strips to run the wires out of the panel.
-
Attach the solar cells to the panel of plywood, using the electrically conductive glue. Leave a small amount of this glue peeking above the top of each cell in order to form an electric link to the terminals on the bottoms of the cells. This edge of glue will be referred to as the “negative terminal” of each cell.
-
Cut 6-inch lengths of wire from your spool of wire, using the wire cutters. Make as many short wires as there are cells in your panel, minus one. Remove 1 inch of insulation from one end of each wire, and 3 inches from the other ends, using the wire cutters.
-
Glue the 3-inch-bare ends of these wires to the tops of the solar cells. Do not let any glue run from the top of the cell and touch the negative terminal of that cell. Do not let any bare wire touch the negative terminals of the cells. Leave the final cell without a short wire on top.
-
Glue each of these wires to the exposed glue peeking over the edge of the cell next to it, after having allowed the glue on the other ends to dry. Allow this glue to dry.
-
Cut two 3-foot sections of wire off the spool. Remove 1 inch of insulation from each end. Glue one to the negative terminal of the first cell, the one without any wire connected to it. Glue the other to the top of the cell on the other end, without any wire on top.
-
Run the long wires out through the gap between the wooden strips. Glue them to the sides of the solar panel so that there is no possibility they will touch each other, which could short out your panel.
-
Cut the Plexiglas sheet to match the size of your panel. Glue it to the top of the wooden strips. When the glue is dry, seal all the edges with silicone caulk to protect it from water.
The Drip Cap
- If you go camping or hunting, or simply want to reduce your electricity bill, then a solar panel might make a good investment for you.
- Even this can be reduced by making your own solar panels at home.
- Add a couple volts’ worth of cells to this number to eliminate the danger of backcharging, which can damage your solar panel.
- Cut 6-inch lengths of wire from your spool of wire, using the wire cutters.
- Do not let any bare wire touch the negative terminals of the cells.
- Glue the other to the top of the cell on the other end, without any wire on top.
- Cut the Plexiglas sheet to match the size of your panel.
Check out this related video.