

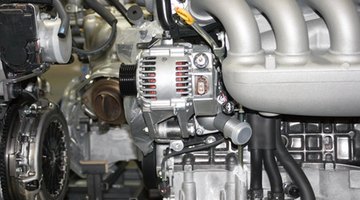
Even if you don't have a GM alternator you can buy one for as cheap as $26 online, as of early 2010. The rest of the supplies you need are available at hardware stores.
Things You Will Need
Nautilus and Pivot
-
Cut the 6-inch length of PVC pipe with the jigsaw to fit any of the GM alternator's mounting brackets. Make sure when you mount the alternator that the body is flush with the tube's end, allowing the shaft to protrude (The shaft needs to protrude as much as possible so the hub won't rub against the generator housing.). After you've fit the alternator in, remove it. After removing the alternator, cut a length-wise 1-inch slot out of the bottom. When you're done, paint the housing with UV spray paint, and let dry.
-
Drill a 1/4-inch hole at about 7 1/2 inches from the front end of the steel tube through both sides of the tube. Use sandpaper to smooth the holes. Cut both ends of the extension cord off and make sure the cord slides through the holes.
-
Cut a narrow slot on the vertical axis to insert the wind vane or rudder, 8 inches into the back end of the tube. Place the metal sheet into the slot, then drill two 1/4-inch holes through the tube and the metal sheet. Use two 1/4-inch nuts and bolts to secure the vane.
-
Wire the alternator to the extension cord. Secure the GM alternator in the PVC pipe. Then, using construction adhesive, secure the alternator pipe assembly to the steel tube and vane assembly. Make sure no adhesive gets on the alternator shaft.


Assemble the Rotor
-
Trisect the the 2-foot to 3-foot section of PVC pipe into one 60-degree section and two 60-degree sections, using the protractor. Use the chalk line to mark out the sections along the pipe's length, then cut the sections out.
-
Cut out the blades: Using the chalkline, mark diagonally (lengthwise) across each 150-degree section of pipe. Then cut them out with the jigsaw.
-
Drill one 1/4-inch hole1/4 inch from the long, straight edge and 1/2 inch from the wide end. Drill another an inch from the first. Then sand down all the edges. Spray with PVC paint and let dry.
-
Mark the saw blade? into three 120-degree sections. Along each mark, measure out 1 1/2 inches from the blade's center. Mark out the sections to match the holes in each blade, then drill through the holes. Attach the blades to the hub with six 1/4-inch nuts, washers and bolts. Don't over tighten the nuts, because it could crack the PVC.
-
Use the alternator shaft nut to attach the rotor assembly to the nautilus and you have a completed wind turbine.


The Drip Cap
- With a little work, you can convert any GM alternator into an electric generating wind turbine.
- The rest of the supplies you need are available at hardware stores.
- Use sandpaper to smooth the holes.
- Cut a narrow slot on the vertical axis to insert the wind vane or rudder, 8 inches into the back end of the tube.
- Use the chalk line to mark out the sections along the pipe's length, then cut the sections out.
- Then cut them out with the jigsaw.
- Use the alternator shaft nut to attach the rotor assembly to the nautilus and you have a completed wind turbine.