
How to Install a Natural Gas Drip Tank

Natural gas pipelines often contain entrained water droplets due to condensation from temperature drops further upstream. These entrained water droplets are carried with the gas due to the velocity of the flow. It is important to remove the water droplets from the gas stream since they will decrease the heating value of the gas as well as hamper certain applications such as natural gas pilot lights. One common method of removing water droplets from a natural gas pipeline is the installation of a drip tank. A drip tank suddenly reduces the velocity of the gas flow, allowing the water droplets to drop out of the gas stream. Sometimes tortuous paths of baffles (metal plates that impede flow) are employed.
Step 1
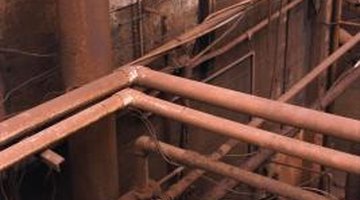
Locate a suitable natural gas line section where the drip tank can be installed. This would ideally be a section that has unions, flanges or other fittings that can be taken apart. Disconnect the gas flow or ensure the section of pipe is completely isolated from the natural gas flow.
Step 2
Disconnect the pipe section using the wrench. Prepare all pipe fitting threads by wrapping them with the thread tape. Wrap in a clockwise direction and ensure the tape is tight on the threads. This will eliminate any leakage.
Step 3
Connect the inlet of the drip tank with the leading edge of the disconnected pipe. The gas flow should enter into the drip tank through this connection.
Step 4
Connect the outlet of the drip tank with the trailing edge of the disconnected pipe. Secure both connections tightly with the wrench. Ensure the drain valve on the drip tank is closed. Reconnect the gas into the pipeline. The gas should enter the drip tank from the top and exit back through the top. Any entrained water should be caught in the bottom of the tank and periodically drained.
References
Writer Bio
Brian Baer has been writing since 1982. His work has appeared on Web sites such as eHow, where he specializes in technology, management and business topics. Baer has a Bachelor of Science in chemical engineering from the University of Arkansas and a Master of Business Administration from the University of Alabama, Huntsville.
Photo Credits
- Jupiterimages/Photos.com/Getty Images
More Articles