
How to Fill in the Space Between a Brick Chimney & a House

Over time, your house will settle. The effects of this settling are usually minimal, such as small cracks appearing in walls, but in extreme cases, your home can be severely damaged. One effect of the settling process is that your chimney can begin to separate from the rest of your home. The gap created by this separation can make your home less energy efficient, while at the same time allowing water to leak into your home. One way to fix this problem is to add flashing to your chimney. This is a metal sheet which forms a watertight seal between your chimney and roof.
-
Remove the flashing and cement from around the base of the chimney by prying the flashing off and chiseling away the cement.
-
Cut a piece of cardboard that is 2 feet square and label the bottom edge "Roof." Lay this edge against the base of the roof. Hold a level against the cardboard and draw a straight line. Label this line "Run." Measure 12 inches into the "Run" line with a framing square, and draw a line from the "Run" line to the edge labeled "Roof." Label this line "Rise." Measure the length of the "Rise" line to determine how many inches the roof rises per 12 inches of run.
-
Measure the front of the chimney and cut a piece of pre-bent base flashing to fit. Cut a 45-degree angle into one side with tin snips.
-
Place the chimney flashing tightly against the base of the chimney at the front, with the side that you cut the 45-degree angle into wrapped around the side of the chimney. Mark the flashing where the chimney ends on the other end and cut a 45-degree angle in the flashing. Wrap the cut piece around the side of the chimney.
-
Drive four galvanized roofing nails through the flashing into the roof, keeping the nails evenly spaced.
-
Cut pre-bent 8-inch square step corner flashing for the side of the chimney, long enough to fit 1 1/2 inches around the front corner of the chimney.
-
Add a bead of caulk about the size of a quarter to the spot on the corner where the chimney and roof meet. Set the corner flashing tight against the corner over the caulk and nail it to the roof with two galvanized roofing nails.
-
Nail a roof shingle over the corner flashing.
-
Place another short piece of pre-bent flashing tight against the chimney over the shingle you just installed and nail it to the roof. Nail a shingle over it. Repeat this until you get to the top of the chimney.
-
Cut and bend a piece of flashing around the top corner of the chimney like you did for the bottom corner.
-
Put the pre-bent chimney saddle tight against the back of the chimney. Drive galvanized roofing nails into the roof through the saddle every 6 inches.
-
Mark the third mortar joint from the roof on the front edge of the chimney and around the corners of the chimney. Along the side of the chimney, mark the joints that are about 4 inches above the top of the flashing. Go straight across the back of the chimney for the saddle.
-
Cut a 1-inch deep groove in the marked mortar joints with a grinder equipped with a diamond blade.
-
Measure and cut front cap flashing that is 8 inches longer than the front of the chimney. Bend it around the chimney, centering it so that 4 inches wrap around each side of the chimney.
-
Place a block of wood over the front of the flashing and drive the flange on the flashing into the groove in the mortar by hitting a hammer against the wooden block (this protects the flashing).
-
Drill holes 1 1/2 inches deep through the metal flashing and bricks on the corners of the chimney. Push expanding plastic anchors into the holes and pound the nail in the anchor with a hammer to open the anchor inside the brick.
-
Mark and cut strips of side-cap flashing to match the rise of the roof. Attach the side cap flashing the same way you attached the front cap flashing.
-
Install cap flashing across the back edge of the chimney.
-
Seal the joints where the flashing meets the mortar with polyurethane caulk.
References
Warnings
- If the roof is extremely high or steep, you may want to buy a personal fall-arrest system. This is a system in which you wear a harness attached to anchors on the roof.
- Wear safety goggles when digging the groove in the mortar.
Writer Bio
Carson Barrett began writing professionally in 2009. He has been published on various websites. Barrett is currently attending Bucks County Community College, pursuing a Bachelor of Arts in sports management.
Photo Credits
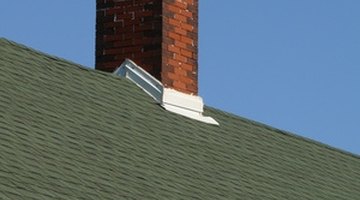
- roof and chimney image by jimcox40 from Fotolia.com
More Articles