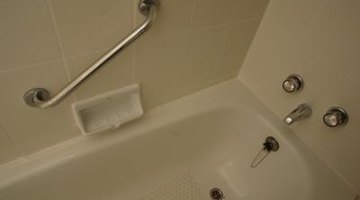
How to Remove an Old Tub Surround
Replacing a tub surround in your bathroom is one way to update the look of the bathroom. Removing the old tub surround can create more work if it is not done correctly. Most tub surrounds adhere directly to the walls with glue. Simply ripping the tub surround down can cause major damage to the walls, requiring more work than you may anticipate. However, with the assistance of a friend, you can remove the old tub surround with minimal damage. The process takes longer, but it results in saving money on wall repair costs.

Step 1
Turn off the water supply to the tub. The shutoff valves are behind the wall with an access panel usually in the adjacent room. Place sheets in the bottom of the bathtub to protect the finish while you are working in the tub.
Step 2
Remove the screws securing the faucet handles with a Phillips screwdriver. Pull the faucet handles away from the tub wall. Place a cloth over the connecting nut that secures the shower head to the shower arm. Grasp the shower arm near the wall with one hand and turn the shower head connecting nut counterclockwise with an adjustable wrench. Remove the shower head from the arm.
Step 3
Feel under the tub spout for a set screw. If necessary, look under the spout to locate any set screw. Remove the set screw with a Phillips screwdriver and pull the spout away from the wall. If your spout does not have a set screw, the spout threads onto the plumbing pipe. Place a cloth over the spout to protect the finish. Turn the spout counterclockwise with a pipe wrench.
Step 4
Look for any plastic rivet heads on the tub surround. Some tub surrounds use plastic rivets as well as glue to fasten the surround to the wall. Cut the rivet heads off with a sharp utility knife. Score with the utility knife along the top edge of the tub surround where it meets the wall. Score along the side edges between the tub surround and the wall with the utility knife. Cut the caulk between the tub and the bottom of the tub surround with the utility knife.
Step 5
Remove any top retaining trim from the tub surround. Although the tub surround panels use glue to adhere to the wall, the top retainers often have no glue. Lift up on the retainers to remove them from the top of the surround. There is a retainer for each panel of the tub surround. Pull off the two side retainers in the same manner.
Step 6
Start removing the tub surround at the wall opposite the plumbing. Pull the surround away from the wall at the upper right corner. Ask a friend to cut the glue between the surround and the wall with the utility knife as you pull the surround away from the wall. Work slowly to reduce the amount of damage to the drywall behind the tub surround. Once the panel is free from the wall, pull it away from the corner retainer and set it aside.
Step 7
Pull the corner retainer away from the side wall panel and repeat the process of pulling and cutting the panel from the wall. There may be two separate panels on the side wall, separated by a piece of retaining trim. Once one panel is free, remove the center retaining trim and remove the second side panel.
Step 8
Cut a notch from the top of the plumbing wall's tub surround panel to the shower arm. Begin pulling the panel away from the wall, starting with the upper corner facing away from the side wall. This will give your helper room to cut the glue with the utility knife. Continue the pulling and cutting until the panel is off the wall. The notch cut by the shower arm will help you remove the panel from around the shower arm without pulling on the arm.
References
Writer Bio
Kenneth Crawford is a freelance writer with more than 10 years of experience. His work has appeared in both print and online publications, including "The American Chronicle." Crawford holds an associate degree in business administration from Commonwealth College.
Photo Credits
- Photos.com/Photos.com/Getty Images
More Articles


