How to Fix a Leaking Danby Countertop Dishwasher
A Danby countertop dishwasher allows you to clean up to four place settings of dishes or 25 glasses in a single cleaning cycle. Typically, the source of leaking within one of these dishwashers is a hose, the cabinet, a faucet, a hose fitting or hose connector. Reasons for leaks include hose damage, cabinet damage, an unlevel cabinet, extremely high water pressure, loose fittings or broken seal washers. Once you determine the source of the leak, fixing a leaky Danby countertop dishwasher isn't difficult with do-it-yourself repair possible in most scenarios.
Hose and Cabinet Leaks

Step 1
Shut off the faucet as soon as you detect any leaks.
Step 2
Wipe up the water and dry the cabinet, fittings and hoses with microfiber cloths.
Step 3
Turn the water back on slowly to confirm the source of the leak. If the intake or drain hose has a hole, replace it by unscrewing the old hose from the intake or drain port and faucet adaptor and replace with the new hose. If the cabinet of your dishwasher leaks, continue with the repair process.
Step 4
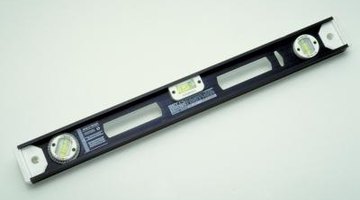
Place a level on top of the cabinet to determine whether the dishwasher is sitting level on the countertop. If not level, screw or unscrew the feet on the bottom to adjust the height at each corner until the bubble in the level moves to the center of the indicator lines.
Step 5
Run a short rinse cycle. If the cabinet still leaks, don’t attempt any additional repair. Shut off the water, disconnect the hoses and contact a certified Danby repair technician or Danby for assistance.
Faucet or Valve Connector Leaks
Step 1
Shut off the water at the faucet as soon as a leak occurs.
Step 2
Dry the wet areas thoroughly with microfiber cloths, and tighten the collars on all fittings by hand at the faucet as well as at the drain hose and inlet hose ports at the back of the dishwasher.
Step 3
Turn the water on slowly to check for leaks. If still leaking, unhook the hoses and faucet adaptor and check for old or damaged washers inside the adaptor where it fits onto the faucet and also where the hoses fit onto the adaptor. Check inside the intake and drain ports as well. Replace any washers that have tearing, wear marks or cracks, reconnect the faucet adapter and hoses and turn on the water again to test for leaks.
Step 4
Disconnect the hoses and faucet adaptor again if still dealing with leaks, and wrap Teflon tape three to four times around the threads on all male type connectors and fittings. Male connectors have threads on the outside rather than on the inside of the fitting. Smooth the tape against the threads, and reconnect the hoses and faucet adaptor.
Step 5
Tighten the collars and test again. If still leaking, ask your municipality water provider or a plumber to check, and if necessary, reduce, the incoming water pressure. The incoming water pressure should range between 15 and 120 pounds per square inch.
References
Tips
- If water leaks from around the door, make certain that you haven't overloaded the dishwasher and that you loaded it following Danby guidelines. If still leaking at the door, check the gasket to see if it's loose, torn or broken. If damaged, repair through a certified Danby appliance repair technician.
- If the adaptor or cabinet hose fittings have cracked or damaged collars, purchase a new one and replace the broken adaptor or fitting.
Warnings
- Never use non-dishwasher detergents in your Danby countertop dishwasher. Many detergents create too many suds or contain ingredients that damage seals or parts, resulting in leaks. If your dishwashing detergent suds too much, reduce the amount used.
Writer Bio
Based in Southern Pennsylvania, Irene A. Blake has been writing on a wide range of topics for over a decade. Her work has appeared in projects by The National Network for Artist Placement, the-phone-book Limited and GateHouse Media. She holds a Bachelor of Arts in English from Shippensburg University.
Photo Credits
- Ablestock.com/AbleStock.com/Getty Images
More Articles
- How to Replace Portable Dishwasher Hoses
- How to Install a Dishwasher Under a Quartz Countertop
- How to Fix a Front-Load Washer Rubber Gasket With Duct Tape and Silicon
- How to Troubleshoot an Annovi Reverberi RKA 4037
- My GE Potscrubber Dishwasher Is Leaking Underneath
- How to Install a RapidHeat In-Line Heater in a Jacuzzi


