
How to Convert an 18-Inch Chain Saw to a 20-Inch
A chain saw engine turns a sprocket. The chain rests on a stationary bar and wraps around the sprocket so that the chain turns forward to cut. The length of a chain saw is the bar and chain length on it. Longer chain saws will cut through larger trees without your having to remove the chain saw from the trunk and cut inward from both sides to fell the tree. Changing the bar and chain on your 18-inch chain saw to a 20-inch size will enable easier cutting of larger trees and branches.
-
Put work gloves on to protect your hands and fingers. Turn off the chain saw. Unscrew both blade cover nuts counterclockwise with an adjustable wrench. Remove the nuts and pull the blade cover straight off.
-
Turn the tensioning screw counterclockwise until the tensioner slides against the left side of the slot. This releases the tension on the chain.
-
Push the hand guard toward the front of the chain saw to disengage the chain brake. Pull the 18-inch bar and chain straight off the chain saw.
-
Place a 20-inch bar on the chain saw, aligning the holes in the rear of the blade onto the studs.
-
Place a 20-inch chain on the tip of the bar, work it onto the bar at the top, and then the bottom of the bar to the rear. The cutting blades face right when you look at the chain from the rear of the chain saw.
-
Pull the chain around the round metal sprocket behind the rear of the bar. Turn the tensioning screw clockwise to tighten the chain. Place a thumb and forefinger on the chain and pull the top forward. The correct tension on the chain is achieved when it touches the bar on all sides, does not sag and the chain will pull by hand with light force.
-
Align the blade cover on the two studs. Replace both nuts and tighten them clockwise with an adjustable wrench.
References
Tips
- New chains stretch until they are broken in. When the chain sags underneath the bar, stop the chain saw and tighten the tensioning screw to prevent the chain from flying off the bar and causing an accident.
Writer Bio
Mary Lougee has been writing for over 10 years. She holds a Bachelor's Degree with a major in Management and a double minor in accounting and computer science. She loves writing about careers for busy families as well as family oriented planning, meals and activities for all ages.
Photo Credits
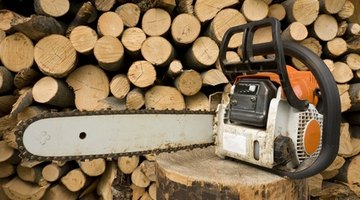
- Chain saw against firewood pile image by Andrzej Thiel from Fotolia.com
More Articles
- How to Adjust a Lawn Mower Chain
- How to Remove the Cover From a Sunbeam Mixmaster Mixer Model 2366
- How to Replace a Blade on a Delta Shopmaster Miter Saw
- How to Take a Link Out of a Chainsaw Blade
- How to Replace the Evaporator Fan on a KitchenAid Refrigerator
- How to Adjust the Carburetor on a Stihl 066 Chainsaw