
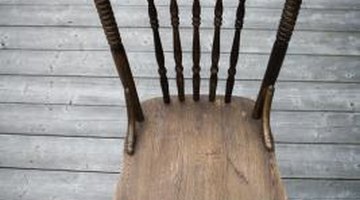
How to Remove Wood Plugs on Wood Chairs

Wood plugs are pieces of dowel cut to the proper length and glued into a hole to cover a countersunk screw. Countersinking means to sink the screw lower than the surface of the wood. Chair manufacturers use countersunk screws to fasten chair legs and backs to the seat, but the process leaves behind unattractive holes. Wood plugs, though, create a finished surface. Repairs to chair backs or legs require removing these plugs to access the screws.
Drilling Wood Plugs
Step 1
Mark the center of the wood plug with a marking pen or carpenters pencil.
Step 2
Equip a power drill with a paddle bit. A paddle bit is a flat drill bit with a point in the middle, used to create holes in wood. Measure the wood plug and match the flat surface size of the paddle bit to the plug.
Step 3
Place the center pointed area of the paddle bit on the center mark of the wood plug.
Step 4
Turn on the drill to grind the wood plug out of the hole. Drill slowly so as not to damage the chair or the fastener under the plug. Damaging screw heads under plugs will make removing them difficult.
Chipping Out Wood Plugs
Step 1
Place a thin chisel or flat-blade screwdriver onto the center of the wood plug.
Step 2
Tap the chisel with a mallet or lightweight hammer to crack and splinter the plug.
Step 3
Rotate the chisel 45 degrees and tap again with a hammer. Keep the chisel positioned straight. Angling it can damage the chair.
Step 4
Pull out splintered pieces of wood with needle-nose pliers. Chip away at the wood plug until the hole is empty.
References
- "Repairing Furniture"; Time Life Editors; 1997
Writer Bio
Sal Marco began writing professionally in 2009. He has written many online home improvement articles based on his more than 20 years of experience in the home improvement and building industries. He has worked as both part of a team and as a site supervisor. Marco has a Bachelor of Science in management science from Kean University.
Photo Credits
- Jupiterimages/Photos.com/Getty Images
More Articles