
How to Make a Headboard Out of Old Shutters

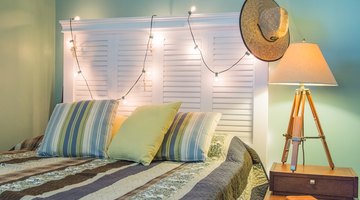
The construction of a headboard using old shutters is easy and inexpensive. The headboard adds to a bedroom decorated in a beach motif or farmhouse style.
Whether you would like to create a beach motif or design a shabby chic farmhouse-style bedroom, a headboard made from old shutters is an easy way to add a repurposed treasure to your bedroom. Now you can get that Pottery Barn look for less than $150, thanks to this DIY shutter headboard.
Things You Will Need
- Reclaimed shutters
- Protective eyewear
- Particulate respirator
- Pencil
- Tape measure
- Straight edge
- Speed square (optional)
- 1 x 4-inch board, 8 ft. long (Qty. 4-6)
- 1 x 2-inch boards, 8 ft. long 8' (Qty. 2-4)
- 1 x 1-inch boards, 8 ft.long (Qty. 1-2)
- Crown molding
- Wood glue
- Wood screws (may substitute drywall screws)
- Bar clamps
- Drill
- Miter saw
- Table saw (optional)
- Brad nailer (optional)
- Finishing nails
- Woodworking clamps
- Wood filler
- Sandpaper
- Spray paint
-
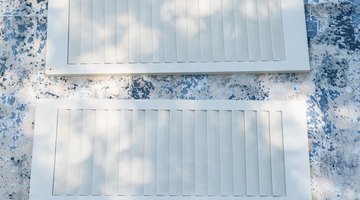
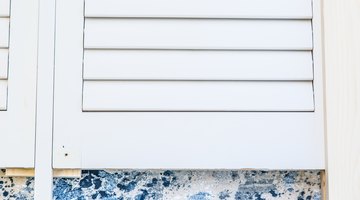
Locate vintage shutters at a thrift store, antique shop, or resale shop. Purchase shutters that have character but are also functional for your project. Cracked paint, visible wood, and other antique-like characteristics add to the style, but also increase the difficulty of matching new building materials with reclaimed products. For this project, I chose plantation-style shutters that are the same thickness as the wood I used to frame the headboard.
-
Remove all of the hardware from the shutters, then clean the shutters and remove any rough or uneven edges that may interfere with constructing the headboard.
-
With the necessary construction materials on hand, develop a construction plan based upon how you would like the headboard to look at completion. I chose to finish this queen-size headboard with crown molding to accent the beauty of hand craftsmanship and create a small shelf at the top. If it helps, sketch out a plan on paper.
-
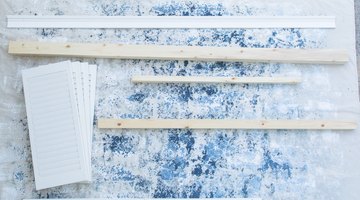
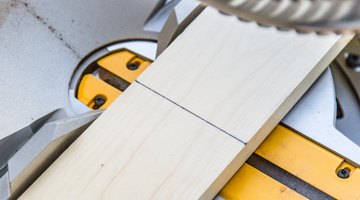
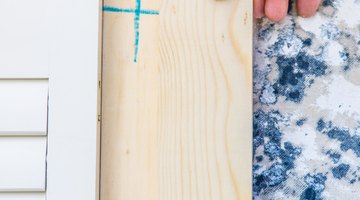
The vertical 1 x 4-inch planks will serve as the legs of the headboard and also frame the shutters. I wanted this shutter headboard to have a height of 60 inches at completion. Measure and mark your cut lines. Then, wearing protective eyewear, carefully use a miter saw to cut the four 1 x4-inch planks to the desired length.
-
Using a board of the same thickness as the shutters, measure and mark your cut lines for the interior piece of the frame. In this case, I used a 1 x 3-inch board to create a frame that sandwiched the shutters. Having the shutters sandwiched between the wood planks increases the strength of the headboard and gives it a more dramatic look.
-
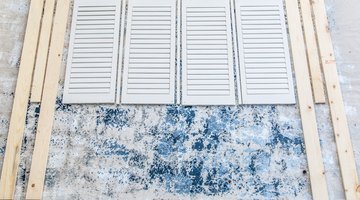
Once you have the main components cut, lay out the shutters and vertical planks to determine the approximate width of the final project. Recall, the width of a queen-size bed is 60 inches, so your headboard should be at least that wide.
-
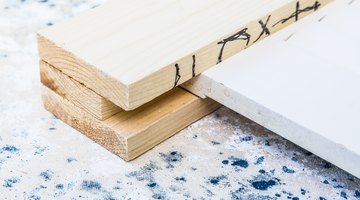
I increased the width of my headboard 2 1/4 inches utilizing 1 x3/4 inch boards that I had previously removed from the shutters when I stripped the shutters of all of their hardware in Step 2. These thin boards act as spacers to get the width I desire.
-
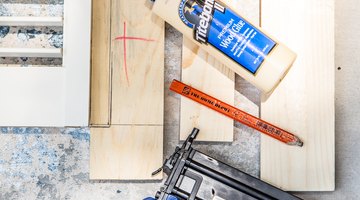
Lastly, after the final width has been determined, you can now measure and cut your 1 x 4-inch planks and 1 x 3-inch planks that will frame the top and bottom of the shutter headboard.
-
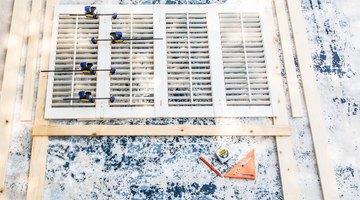
Now that all of your dimensions have been determined and wood has been cut, it is time to assemble the headboard. If you lay everything out, it is easy to see how the pieces, like a puzzle, will fit together.
-
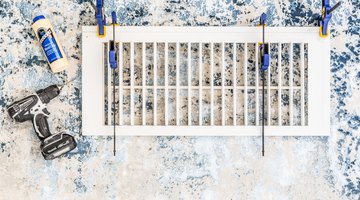
The first step of assembly is to secure the shutters together using wood glue and wood screws.
-
Utilize bar clamps to ensure a perfect fit.
-
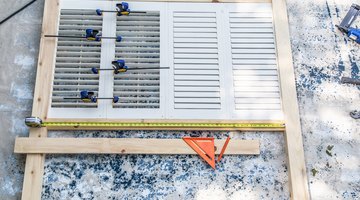
Now that the shutters are secured together, it is time to attach the boards that will act as the frame of the headboard. Again, I have laid all of the materials out so that I can see how each of the components will fit together. Doing so helps me to see that the headboard will be symmetrical and level. Assembling the headboard in layers enables me to glue and nail each layer, thereby creating a very sturdy end result.
-
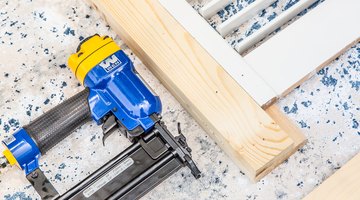
Start by fitting the shutters at either side of the headboard into the frame and secure the shutters using wood glue and a brad nailer.
-
Next, add the 1 x3-inch boards to create the next layer, and again secure using wood glue and the brad nailer.
-
Lastly, add the 1 x 4-inch boards to create the top layer, and secure with wood glue and brad nails.
-
For this headboard, I decided to add crown molding to the top of the headboard to accentuate its look. The crown molding adds to the form and functionality, creating a shelf, or ledge, at the top of the headboard. Raising the molding 3/4 inch above the top of the headboard frame leaves room to place a 1 x 3-inch board at the top.
-
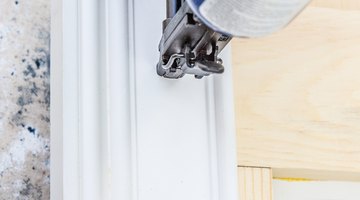
The first step necessary to attach the crown molding is to measure your cut lines on the back of the crown molding. Remember, you will be cutting the ends of the crown molding at 45-degree angles so that the details of the molding can continue around the corners to the "reveals" on each side, using short pieces of molding. Once the front molding is cut, attach it to the front side of the headboard with wood glue and/or brad nails. Doing so will make it easier to measure and cut the correct length of the crown molding to be attached to the sides.
-
Now, measure and cut the short side pieces of crown molding with your miter saw, and attach them with wood glue and/or brad nails. Finally, measure and cut the 1 x 3-inch board to be placed at the top of the headboard behind the crown molding.
-
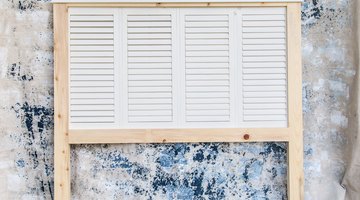
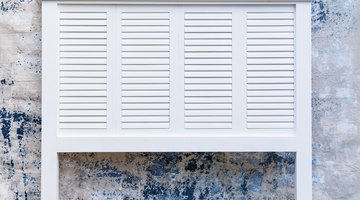
When everything is put together, you can start to see the beauty of the shutter headboard.
-
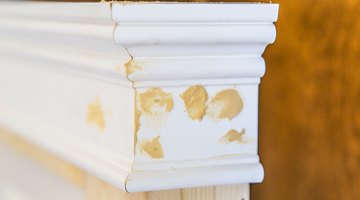
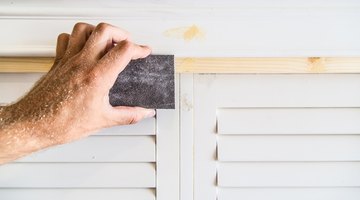
The next step is to prepare the headboard for painting. This step includes filling any nail holes with wood filler. Additionally, it is important to sand any rough edges and inspect the headboard for any blemishes that should be fixed prior to the final step of painting. The wood filler will require adequate time to dry before sanding it smooth.
-
The flat pieces of the headboard can be sanded using a sanding block; however, the crown molding at the top is easiest to sand with a small, folded piece of sandpaper.
-
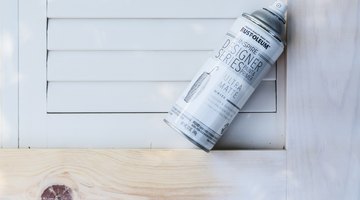
The final step is to paint the headboard. Painting can be accomplished using a brush to paint the headboard or with spray paint. For this project, I chose to use spray paint to evenly apply paint to shutters and the rest of the headboard. The condition of the shutters used for the project will dictate what style of paint should be used. Apply the paint evenly, so that the paint does not run and does not leave bare spots. It may take multiple coats of paint to create a smooth, even finish.
-
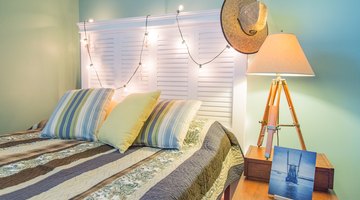
This reclaimed shutter headboard adds the perfect touch to your beach or farmhouse inspired decor.
-
Get that Pottery Barn feel at a fraction of the cost!
Locate vintage shutters
Tip
Craigslist is a good place to look for used items that can be repurposed into exciting new projects!
Remove hardware from the shutters
Develop a plan for construction of the headboard
Tip
An important component of the construction plan will include the desired dimensions of the headboard at completion. The typical width for a queen-size headboard is approximately 62 inches wide. The height of the headboard is dependent on your preferences for style and design.
Cut vertical planks to the desired length
Warning
Protective eyewear and a particulate respirator should be worn when cutting or sanding wood.
Create the frame for the shutters
Determine the width of the headboard
Assemble the shutters of the headboard
Tip
Do a "dry run" to fit the shutters together to ensure that you will have a proper fit, before applying wood glue.

Assemble the frame of the headboard
Attach the crown molding
Prepare the headboard for paint
Paint the headboard
Writer Bio
Brent Paape is a Registered Nurse, photographer, and children’s book author, but is always searching for his next DIY project. He resides in Charleston, S.C.
More Articles