How to Connect a CPVC Pipe to a Metal Shut-Off Valve
Metal shut-off valves usually have a brass body and are chrome plated for an aesthetic look. They can be attached to the end of chlorinated polyvinyl chloride (CPVC) water supply pipes. The inlet on the end of the valve has a CPVC inner sleeve that the pipe fits into once primer and cement have been applied to both the pipe and sleeve. A flexible water supply hose then runs from the other end of the shut-off valve up to the water fixture.

-
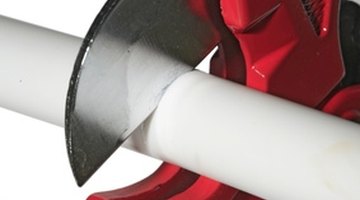
Mark the CPVC pipe at the point where the shut-off valve will be installed. Place the pipe in the jaws of a tube cutter, resting the blades on the mark.
-
Squeeze the tube cutter's handles together to make a clean straight cut through the pipe. If any burrs exist on the cut pipe end, scrape them off with a utility knife.
-
Brush polyvinyl chloride (PVC) primer to the outside end of the CPVC pipe. Prime the CPVC inner sleeve on the inside of the valve's inlet as well. Brush PVC cement to the primer area on the outside of the pipe and the valve's primed inner sleeve.
-
Push the pipe quickly into the valve's inlet and hold it in place for 5 seconds while the cement dries. If the CPVC pipe has already been installed to the end of the water line, when pushing the valve onto the pipe make sure the valve handle is positioned so that it can be easily accessed.
References
Warnings
- As PVC cement dries very quickly, do not apply it to either the pipe or valve's inner sleeve until the two are ready to be joined together.
Writer Bio
Steve Sloane started working as a freelance writer in 2007. He has written articles for various websites, using more than a decade of DIY experience to cover mostly construction-related topics. He also writes movie reviews for Inland SoCal. Sloane holds a Bachelor of Arts in creative writing and film theory from the University of California, Riverside.
Photo Credits
- scissor cut white plastic pipe image by Graf_es from Fotolia.com
More Articles


