
How to Connect the Wires to a Whirlpool Dryer Motor

Connecting the wires to a Whirlpool dryer motor is straightforward if you take notes prior to starting the project. The wiring diagram is usually pasted to the metal back cover of the dryer, but if the diagram is no longer there, it's essential to remember which wire attaches to which terminal on the motor.
-
Disconnect the appliance from the power supply and remove the back cover with a screwdriver.
-
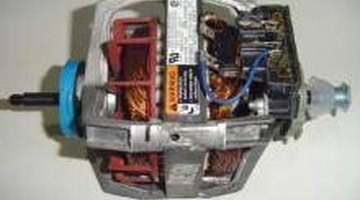
Unscrew or cut the wires from the old motor and make a note of the color and corresponding number of each wire. Failure to do this will result in frustration and probable calls to a repairman.
-
Remove the old motor by unscrewing the unit from the mounting brackets.
Install the new motor on the mounting brackets and align in the same position as the old motor.
-
Reattach wires as follows:
Attach the red wire from the old motor's terminal 1 to terminal 1 on the new motor.
Take the red wire that was on the old motor's terminal 2 and connect to terminal 2 on the new motor.
Attach the purple wire from the old terminal 3 to terminal 3 on your new motor (note: some replacement wires are white for terminal 3).
Connect the blue wire on terminal 4 to the dryer's thermal overload switch, which is a circuit breaker.
Connect the white wire from terminal 5 to terminal 5 on the new motor.
Attach the black wire that was on terminal 6 to the new motor's terminal 6.
-
Slip the drive belt over the pulley on the motor and check for proper tension.
-
Replace the dryer cover and reconnect the appliance to the power supply.
References
Warnings
- Always disconnect appliances from the power supply before attempting any repairs.
Writer Bio
James Clark began his career in 1985. He has written about electronics, appliance repair and outdoor topics for a variety of publications and websites. He has more than four years of experience in appliance and electrical repairs. Clark holds a bachelor's degree in political science.
Photo Credits
- Laneappliance.com
More Articles
- How to Replace a Wall-Mounted Phone Jack
- How Do I Change the Belt for a Kenmore 700 Series Dryer?
- How to Test a Kenmore Dryer Timer
- How to Replace a Whirlpool Duet Electric Dryer Belt
- How to Remove the Housing on a PYE2300AYW Maytag Electric Dryer Lint Filter
- How to Replace Receivers in Harbor Breeze Ceiling Fans