
How to Install Crown Molding Around Air Vents

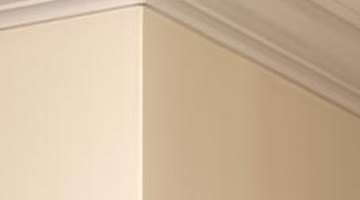
Most homeowners love crown molding. If crown molding has not already been installed in a home when it is bought, many homeowners will take the time to install it themselves. The installation process is fairly straightforward. However, air vents and ducts can be difficult to work around. Installing a crown molding return on the end of the molding will allow you to stop and start the molding around the vents without having unfinished molding edges.
-
Take the measurements for the wall where the air vent is located with a measuring tape. In most cases you will be measuring from the corner to the air vent. Write this measurement down and then measure again from the heat register to the other corner of the wall. Write down the second measurement. Transfer these measurements to the crown molding pieces with a pencil.
-
Place the crown molding on the miter saw. Adjust the positioning so that the top of the molding rests against the saw fence and the bottom of the molding rests against the miter saw table.
-
Set the miter saw to a 45 degree angle. Hold the molding in position and cut the molding to size.
-
Secure the crown molding to the wall with a pneumatic nail gun. The unfinished end of the molding should stop just before the air vent.
-
Create a return cap for the unfinished ends of the molding. Set a scrap piece of the crown molding on the saw. The saw should be set at a 45 degree angle in the opposite direction of the cut that was made for the main crown molding pieces that butt against the air vents. Position the molding so the top rests against the fence and the bottom rests against the table of the saw. Cut the scrap piece with the saw.
-
Set the miter saw to a 90 degree angle. Place the crown molding flat on the table of the miter saw. You will be creating a small v-shaped piece that will fit into the unfinished end of the crown molding. Cut the piece to size. Test the fit of the return cap. If it doesn't fit cut again as necessary.
-
Spread a small amount of wood glue on the inside edge of the return piece. Push the piece into place and tape it with painters tape so that it can't move. Let the glue dry and remove the painters tape.
References
Writer Bio
Cadence Johansen is a freelance writer who enjoys writing about travel, marriage, family relationships, caregiver support, home improvement and money. Johansen has been writing professionally since 2008. She holds a master's degree in family studies from Utah State University.
Photo Credits
- Jupiterimages/Photos.com/Getty Images
More Articles