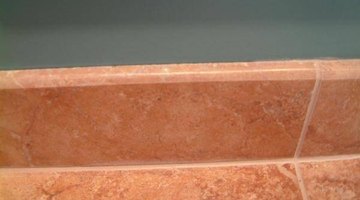
How to Install Bullnose Tile Baseboards
Installing a bullnose tile baseboard is a great way to finish off a flooring tile project. It looks great, it flows well with the flooring tile, and it is not a difficult project to complete. A project like this is just like installing tile on a wall, but to a much smaller extent. The process is exactly the same.

Things You Will Need
- Acrylic mastic
- V-notch trowel
- Tape measure
- Grout float
- Grout (to match the color in the floor tile)
- Grout sealer
- Wet tile saw
- Vacuum
- Silicone caulk
- Caulk finishing tool
-
Purchase bullnose tile that matches the floor tile. Some manufacturers do not produce bullnose tile that will match their floor tiles. In this case, buy extra wall tiles and cut them with a wet tile saw to the height you would like the base board to be. You will be able to produce two baseboard tiles per floor tile in this manner.
-
Prepare the wall to receive the tile by cleaning off any thinset, grout or joint compound that may be on the wall to prevent a quality installation. Vacuum up the debris produced during this step.
-
Spread tile mastic horizontally across the base area of the wall. Do not spread more mastic on the wall than you will be able to cover in less than 5 minutes. For example, if you feel that you will be able to cover 10 linear feet of mastic with tile in less than 5 minutes, do not spread 15 linear feet of mastic on the wall. Also, do not spread mastic in an area wider than the width of the bullnose tiles. If the v-notch trowel is wider than the bullnose tile, spread the mastic on each tile individually.
-
Begin placing tile in the mastic. Use the same tile spacers between each bullnose tile that you used between the floor tile so the grout lines will line up and look even. Also, place two tile spacers flat under each bullnose tile between the bullnose tile and the floor. Allow the mastic under the bullnose tiles to dry for 24 hours.
-
Remove the spacers from between the tiles. Mix up a batch of grout to a peanut butter consistency, and force the grout into the grout lines between the bullnose tiles. Force grout into the corner between the bullnose tiles and the floor tiles. If the bullnose tiles are being installed in a bathroom, place a bead of silicone caulk in the corner between the bullnose tiles and the floor tiles. Finish the caulk bead with a finger or with a caulk finishing tool. Allow the grout and the caulk to cure for 72 hours.
-
Install 2 to 3 coats of penetrating grout and tile sealer onto the grout when it has cured.
The Drip Cap
- Installing a bullnose tile baseboard is a great way to finish off a flooring tile project.
- Do not spread more mastic on the wall than you will be able to cover in less than 5 minutes.
- Begin placing tile in the mastic.
- Mix up a batch of grout to a peanut butter consistency, and force the grout into the grout lines between the bullnose tiles.
- If the bullnose tiles are being installed in a bathroom, place a bead of silicone caulk in the corner between the bullnose tiles and the floor tiles.
- Allow the grout and the caulk to cure for 72 hours.
Writer Bio
Josh surprisingly found himself as an English Literature major one day after planning on becoming a doctor for most of his life. He graduated with a BS from Utah Valley University in April 2003.
Photo Credits
- http://www.johnbridge.com/vbulletin/attachment.php?attachmentid=35308&stc=1&d=1196089942
- http://www.johnbridge.com/vbulletin/attachment.php?attachmentid=35308&stc=1&d=1196089942
More Articles


