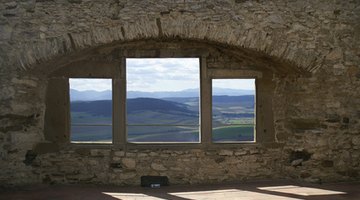
How to Build a Faux Window Light Box
Condos, apartments, basement apartments and other tight living spaces often suffer from a lack of windows. Windows are important: they open up a room, bring the outdoors inside and let in natural light.

If a window-deficient living arrangement makes you feel like you’re living in a cave, there’s a much cheaper solution than adding an actual window to one of your walls: crafting a DIY faux window that emits light like an actual window.
Things You Will Need
- Small window with wood frame
- Outdoorsy image
- Scissors
- Clear spray adhesive
- Pine, 1-inch thick
- Saw
- Measuring tape
- Paint
- Paintbrush
- Small nails
- Hammer
- Drill
- Small hook
- Wood glue
- Low watt night light
- Extension cord
- 2 picture hanging nails
- Level
Tip
If you are having a problem with the nightlight bulb getting too close to the paper image, install a hook on the wall behind the faux window. Pull the end of the extension cord that is closest to the nightlight into this hook.
Warning
Only use a low-watt bulb for this project to avoid a fire hazard.
-
Find a wood-framed window at any home improvement store, or scour flea markets and antique shops for attractive antique windows.
-
Cut your image to fit the exact dimensions of your window; if the image is too small, take it to a copy store and have them enlarge it to fit your window’s dimensions.
-
Spray the front of your image with spray adhesive and apply the image to the back of the window, taking care to match up all borders.
-
Cut your pine into four 4-inch strips, two of which are as tall as your window and the other two cut to match the width of your window.
-
Construct these four pine lengths into a square using the small nails; the square should perfectly fit the dimensions of the window. Paint the square to match the window.
-
Find the center of the top of the inside of the box. Drill a pilot hole for the small hook, then screw in the small hook.
-
Glue the open box to the back of the window. Thread the extension cord through the hook. Remove the decorative cover to the nightlight.
-
Attach the nightlight to the extension cord. Allow the nightlight to drop about half-way to the center of the box; make sure that when the light hangs, it does not touch the paper image.
-
Measure from top corner to top corner on the inside of the box. Draw a line of this length on the wall where you want to hang your faux window; check with the level to make sure this line is straight and even. Hammer your two picture nails at each end of the line. Hang the box on these nails, resting the top lip of the box on the nails.
-
Plug in the extension cord to light up your window, illuminating your outdoor scene and completing the process.
The Drip Cap
- Condos, apartments, basement apartments and other tight living spaces often suffer from a lack of windows.
- If a window-deficient living arrangement makes you feel like you’re living in a cave, there’s a much cheaper solution than adding an actual window to one of your walls: crafting a DIY faux window that emits light like an actual window.
- Construct these four pine lengths into a square using the small nails; the square should perfectly fit the dimensions of the window.
- Glue the open box to the back of the window.
- Attach the nightlight to the extension cord.
References
Writer Bio
Katherine Harder kicked off her writing career in 1999 in the San Antonio magazine "Xeriscapes." She's since worked many freelance gigs. Harder also ghostwrites for blogs and websites. She is the proud owner of a (surprisingly useful) Bachelor of Arts in English from Texas State University.
Photo Credits
- window image by aldaer from Fotolia.com
- window image by aldaer from Fotolia.com
More Articles


