
Instructions for Pillsbury Bread Maker 1025

If you have an older Pillsbury bread maker, such as a model 1025, you may no longer have the instruction manual on hand, and finding one may prove difficult. Using the machine, however, is a straightforward process.
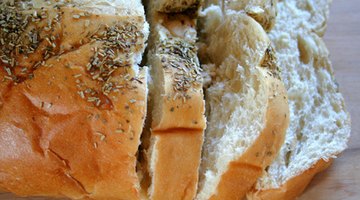
The Pillsbury machine kneads and bakes the bread once you have added ingredients, and you can choose what color crust you'd like.
Things You Will Need
- Oven mitts
- Cooling rack
Tip
As the machine kneads the dough, the movement of the blade will be inconsistent. This is a normal function of the machine. While the machine is in the "Bake" function, it is normal for steam to rise from the sides and rear of the lid.
Warning
The yeast should only come into contact with the dry ingredients as contact with water may prevent the bread from rising.
-
Set the bread maker in a location that is free of drafts and near an electrical outlet. Open the lid and lift the bread case from the unit using the handle. Set it aside.
-
Locate the kneading blade. Attach it to the drive shaft that is located in the bread case. Push it down firmly to ensure that it is secure to prevent it from lifting off in the dough.
-
Empty your ingredients into the bread case. According to the Pillsbury manual, the ingredients should be put in a specific order: water followed by flour, then the other dry ingredients. Create a hollowed-out area in the center of the flour and add the yeast in that area. Do not make the hollowed-out flour area so deep that the water beneath is exposed.
-
Wipe down the outer walls of the bread case to remove any spilled water or other ingredients. Lower the case into the bread machine, aligning it with the right and left guides. Lower the handle and press down on the case until you hear a click.
-
Plug the machine into the outlet. Confirm that the display screen shows "000" after it is plugged in.
-
Press the "Select" button until your desired bread mode is indicated. When using the basic mode, you also have the option to select the color of the crust when instructed.
-
Locate the "Start" button on the unit. As the machine starts, the display will indicate that it is in the "Knead" cycle and will count down the time left in that cycle. Each subsequent cycle, such as "Rise" and "Bake," will be indicated on the display screen along with the minutes remaining in that cycle.
-
Wait for the buzzer to sound three times. At this time, the display screen should say "Complete" as well as "0:00." The bread has finished baking.
-
Press the "Stop" button to turn off the unit. Wearing oven mitts, lift the bread case using the handle.
-
Turn the bread case upside down over a cooling rack. Use both gloved hands to shake the case and free the bread. Rotate the drive shaft that is located at the bottom of the case if you are having difficulty removing the bread. This will help to loosen the bread.
-
Place one hand over the opening of the bread case to guide the bread as it begins to slide loose. Place the bread on the cooling rack. Remove the kneading blade if it is still attached to the bread.
-
Unplug the unit from the outlet.
The Drip Cap
- If you have an older Pillsbury bread maker, such as a model 1025, you may no longer have the instruction manual on hand, and finding one may prove difficult.
- The Pillsbury machine kneads and bakes the bread once you have added ingredients, and you can choose what color crust you'd like.
- Attach it to the drive shaft that is located in the bread case.
- The bread has finished baking.
- Press the "Stop" button to turn off the unit.
- This will help to loosen the bread.
- Place one hand over the opening of the bread case to guide the bread as it begins to slide loose.
- Place the bread on the cooling rack.
References
- Pillsbury Model 1025 Automatic Bread & Dough Maker-Operating Instructions; The Pillsbury Company; 1995
Writer Bio
Mai Bryant is a Northern California writer who specializes in writing about health-related topics, fashion and relationships. She began writing online in 2005 but has freelanced privately for more than 10 years. Bryant's eclectic professional background as a medical technician, a licensed cosmetologist, copywriter and event planner allows her to write with authority on numerous topics.
Photo Credits
- bread 2 image by Lee O'Dell from Fotolia.com
- bread 2 image by Lee O'Dell from Fotolia.com
More Articles