
Free Directions for a PVC Quilting Frame

Quilting takes a lot of patience and even more skill. Because quilts are so large and flimsy, it is hard to work on them without having a quilt frame to stretch sections flat for sewing. You can buy an expensive professionally made frame or make one out of PVC pipe.
You will find that a homemade quilt frame works just as well and you will achieve the same results. Quilt frames can be made in squares, rectangles, even triangles and in any size to suit your needs.
Things You Will Need
- 3/4-inch PVC or CPVC pipe
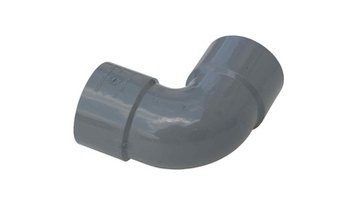
- Four 3/4-inch CPVC 90-degree elbows or four 3/4-inch CPVC three-way L fittings (for legs)
- Four 3/4-inch PVC caps (for legs)
- Hacksaw
- Sandpaper
- Four quilt frame clamps or 2-inch PVC pipe
Warning
Wear thick work gloves and eye protection when cutting the pipe.
-
Determine the size and shape of your frame. You will be working on the section of the quilt that is attached to the frame, so you will want it to be small enough to be within reach, but large enough that you do not have to move it very often. Decide whether you want to hold the frame on your lap or give it legs so it will stand on its own. PVC pipe is fine for smaller frames, but CPVC -- a stronger hot- and cold-water pipe -- is recommended for larger frames, or those with legs.
-
Draw a diagram of your desired quilt frame complete with size requirements before going to the hardware store. If adding legs, you will need to determine whether the quilting frame table will have a tilt, making it easier to see the entire section of fabric.
-
Cut the pipe. (C)PVC pipe will come in long lengths, such as 10 feet. Measure and mark the pipe with a marker and cut the pieces to size with the hacksaw. You will need four lengths of pipe for a lap frame and eight lengths for a table frame. For legs, cut two of the legs -- for the front -- 2 to 5 inches shorter than the back legs, depending on how tilted you want it to be.
-
Attach the elbows or fittings on the ends of the cut pipe to assemble the shape. Make sure the third opening on each of the three-way fittings faces the same way on all four. Attach the legs, making sure the two shorter legs go on the front of the table.
-
Attach PVC caps to the bottom of the legs for stability.
-
Purchase quilting frame clamps at any art and crafts store, or prepare to cut your own. Using the 2-inch pipe, or wider, depending on the thickness of your quilt, mark the center on the side of the pipe. Mark the top of the pipe in 2-inch increments for as many clamps as you will want. Usually one or two clamps are placed on each side, depending on the length.
-
Cut the pipe for clamps. Saw off the 2-inch pieces and then, cutting along the length of each piece, remove a section that is a bit less than half of the pipe's circumference. Sand the edges smooth so they do not pull or catch on the fabric. You should be able to drape the quilt fabric over the frame pipe and then snap each clamp over both, trapping the fabric and holding it firmly against the frame pipe. You may end up with several diameters of clamps to hold various thicknesses of fabric.
The Drip Cap
- Quilting takes a lot of patience and even more skill.
- If adding legs, you will need to determine whether the quilting frame table will have a tilt, making it easier to see the entire section of fabric.
- For legs, cut two of the legs -- for the front -- 2 to 5 inches shorter than the back legs, depending on how tilted you want it to be.
- Mark the top of the pipe in 2-inch increments for as many clamps as you will want.
- You may end up with several diameters of clamps to hold various thicknesses of fabric.
References
Resources
Writer Bio
Krista Lee Childers has been actively writing since 1998. Her work, both creative and journalistic, has been featured in several school-affiliated publications including "Euphemism" and "The Indy." Childers' favorite subjects to write about are arts, crafts and hobbies. She received a Bachelor of Science in print journalism from Illinois State University with a minor in technical writing.
Photo Credits
- Blue and coral quilt block background image by Bluebird from Fotolia.com
- Blue and coral quilt block background image by Bluebird from Fotolia.com
- coude en PVC de 90° image by Marie-Thérèse GUIHAL from Fotolia.com
More Articles