How to Build a Basement Bar
The basement is an untapped diamond mine in most homes. The spaces that can be created in this secluded subterranean room can add comfort, refuge and great entertainment.
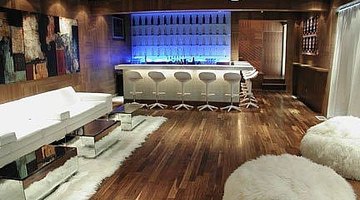
Taking on a basement project is tricky, however. In order to do it yourself, your basement needs to be homeowner friendly. The ceilings should have appropriate clearance so that you do not have to remove and relocate plumbing, electrical and ducting. The structural elements, posts and beams, have to work within your plan and not be required to move. The basement cannot be damp from a water infiltration problem. These issues require the involvement of licensed general contractor.
If you're feeling confident you can work within the as built environment of your basement, then follow these steps to create a pleasing space and a enjoyable basement bar.
Things You Will Need
- Skillsaw
- Hammer
- Drill
- 2x4 lumber
- 2x6 lumber
- Sheetrock
- Sheetrock finishing materials
- 3" Concrete Screws
- Flooring
- Light fixtures
- Countertops
- Appliances (kegerator)
- Furnishings (stools and sofas)
-
Measure the basement and make a drawing. Layout where you want your bar and where you want furniture. Typically, you will locate your bar against one of the shorter walls in the basement and reserve the longer walls for seating and circulation areas.
-
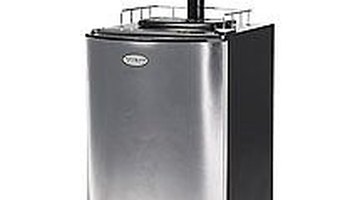
Shop for your major bar appliances such as the kegerator, bar fridge and wine cooler. You want to know the electrical requirements and dimensions of these items in the beginning so you can properly accommodate them in your build out. Also shop for prefabricated cabinets at your local building supply warehouse. Finalize your design once these fixtures are chosen.
-
Begin to transform the raw space of the basement into finished space.
-
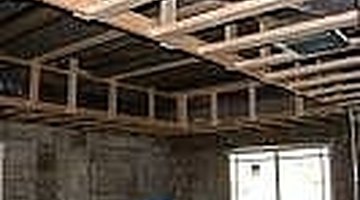
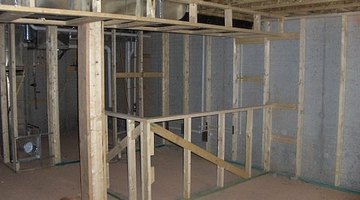
Building a "drop" ceiling out of 2x4 joists is this best way to hide all the pipes, conduits and ducts running about in the ceiling. You may need to frame the ceiling at two different heights to get around the obstructions. This is fine; reference the picture next to this step.
-
Your ceiling joists will need to terminate into a ledger that is anchored into the concrete wall. The ledger is a 2x4 installed with the flat face to the wall and fastened into the foundation wall with 3" concrete screws.
-
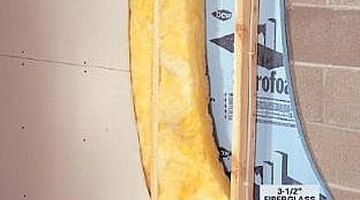
Apply 3/4" rigid insulation to the exposed concrete walls with construction adhesive. This is an important moisture and humidity barrier. Now frame in a 2x4 furring wall against the rigid insulation as pictured. Nail the top plate 2x4 to the bottom of the ceiling joists and screw the treated 2x4 bottom plate into the floor slab with 3" concrete screws. Add 2x4 studs at 16" on center.
-
Frame the bar skeleton. Build a 42" tall pony wall with 2x6 studs and anchor it into the concrete, this is the front of the bar. At the top of the wall, install a 3/4" plywood top that is 18"to 24" wide. Use angle supports to anchor the top to the front of the pony wall. Add 35" tall 2x4 stud framed "wing" walls that connect to the pony wall and extend back into the bar area 24". These wing walls forms the cavity for your appliances and any base cabinets.
-
Add electrical outlets where required. You will need outlets in the pony wall for the kegerator and other appliances. Make sure the outlets are at the correct location for the appliances. Add two above your back bar counter top height for small appliances such as a blender. Install ceiling lighting. Recessed lighting, track lighting and pendants are all good choices for this space.
-
Insulate the furring wall stud cavity with 3-1/2" fiberglass batts. If the ceiling does not have insulation, insulate the ceiling with R30 batts.
-
Hang the drywall with 1-1/4" drywall screws to all walls, ceilings and the bar framing. Tape, mud, sand and finish the sheetrock. Paint the color of choice, the pallet is wide open for this space.
-
Install the cabinets. Screw your base cabinets to the pony wall between the wing walls of the bar and then lay a 3/4" plywood subtop that spans from wing wall to wing wall. Shim the top of the cabinet if there is a gap between it and the subtop and then screw the plywood to the top of the cabinet.
-
Install your bar countertops. You can install prefabricated granite with bull nosing cheaply or you can purchase prefabricated laminate tops and cut them to size. Once you have the pieces cut, just glue them to your plywood subtops. Drill a hole for your beer tap.
-
Install the flooring. Since this area is going to be exposed to plenty of spills and crumbs, go with a wood floor or tile. If you use a wood floor, it will have to be pre-finished engineered wood designed for installation over concrete. These are popular and quite attractive.
-
You can also stain the concrete floor. This is done in many commercial bar and restaurant locations. The look is more contemporary, so make sure it fits with the overall you look you desire.
-
Install your appliances, furnishings, game tables and so on. Thrill your friends and enoy.
Tip
If there is a water heater or furnace in your basement. Frame a closet around it and provide an access door. You can add plumbing for a sink but it will most often require you to cut into the basement concrete floor slab and run your plumbing work. This is expensive. If your basement is fairly small, it may make sense to purchase a prefabricated modular bar which you can find online. You can purchase prefabricated upper and lower cabinets from your local building supply company. Uppers work well on the back wall of the bar and lowers can be slid into place next to the kegerator and coolers at the front of the bar.
Warning
Submit for an over the counter permit for this project. Otherwise, it will be an issue when the home is sold down the line. Non permited improvements always concern the buyer. Make sure you have proper ventilation (fresh air) coming into the space and that your furnace and water heater are exhausting out of the space as required.
The Drip Cap
- The basement is an untapped diamond mine in most homes.
- The ceilings should have appropriate clearance so that you do not have to remove and relocate plumbing, electrical and ducting.
- The basement cannot be damp from a water infiltration problem.
- Measure the basement and make a drawing.
- Shop for your major bar appliances such as the kegerator, bar fridge and wine cooler.
- You may need to frame the ceiling at two different heights to get around the obstructions.
- This is fine; reference the picture next to this step.
- Build a 42" tall pony wall with 2x6 studs and anchor it into the concrete, this is the front of the bar.
- Make sure the outlets are at the correct location for the appliances.
- Hang the drywall with 1-1/4" drywall screws to all walls, ceilings and the bar framing.
- Install your bar countertops.
Photo Credits
- www.rd.com, www.kegerator.com, photobucket.com, myspace, City Corp Ventures
- www.rd.com, www.kegerator.com, photobucket.com, myspace, City Corp Ventures
More Articles


