How to Reroof a Garage
Repairing or replacing a roof is a regular part of property maintenance for all structures, including garages. Garages require a new roof when the old one begins to leak, or shows damage. Replacing the roof can be costly, but it is necessary to prevent further damage.

Things You Will Need
- Hammer
- Crowbar
- Nails
- Staples
- Shingles
- Roof felt
- Sheathing
- Sheathing clips
While installing new garage roofing may sound like a complicated task, anyone with the right tools can complete the job.
-
Contact the local building inspector to acquire building permits. Remove the old shingles or roof covering one layer at a time using a claw hammer or crowbar. Start at the top of the roof, and remove the top ridge covering by prying it loose with the tools.
-
Remove the roofing felt paper underneath the roofing material. Start at the top of the roof, and use the tools to pry it loose from the nails or staples. Inspect the wood sheathing panels under the paper. Replace damaged or warped boards by prying them off from the roofing studs. Saw stubborn boards using a circular saw if necessary to remove them.
-
Replace the roof sheathing by starting at the lower edge of the roof. Attach small sheathing spacers at the end of the sheathing, and hammer the board onto the roof’s studs. Attach the sheathing in a staggered pattern by alternating each row so the ends do not match the previous row‘s pattern. Refer to local building codes regarding the nail size and spacing for roof sheathing in your area.
-
Apply a new layer of roofing felt to the sheathing. Start at the bottom, and roll the sheathing along the bottom of the roof. Cut the ends with a utility knife. Staple or nail the sheathing in place. Overlap the next row’s edge onto the top of the bottom row for proper drainage, and secure it in place. Cover the entire roof with the roofing felt thickness required by your local building code.
-
Lay the first row of shingles by starting at the lower-right corner of the roof. Turn the first row of shingles upside down until the solid black edge is along the bottom of the roof, and the small slits are facing the top of the roof. Nail the shingle in place at the top of each slit using three to four roofing nails. Complete the first bottom row by turning all shingles upside down and then nail them in place.
-
Lay another row of shingles on top of the first row. Place this row of shingles with the colored surface facing up, and the slits facing the bottom of the roof. Nail it to the first layer. Repeat this process to lay the first row. Lay the second row by overlapping the top half of the shingle over the previous row in a staggered pattern. Continue laying each row until you cover both sides of the roof.
-
Attach the ridge covering by inserting the screws or nails, and fasten them in place. Cut off shingles hanging over the edge with a small hatchet or saw.
Tip
Wear gloves to prevent splinters or cuts.
Warning
Always get an assistant to help when lifting heavy sheathing panels, and use a back brace to prevent injury.
Tips
- Wear gloves to prevent splinters or cuts.
Warnings
- Always get an assistant to help when lifting heavy sheathing panels, and use a back brace to prevent injury.
Writer Bio
Benjamin Routh has been an entrepreneur and freelance writer since 2007. His work has appeared on sites such as Ezinearticles.com, Helium.com, and more. He attended East Tennessee State University from 2003-2007, where he majored in accounting and general studies.
Photo Credits
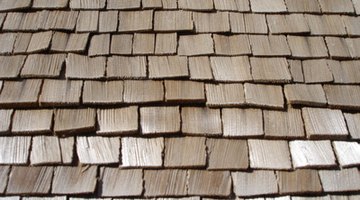
- wood shingles image by Michel Essiambre from Fotolia.com
- wood shingles image by Michel Essiambre from Fotolia.com
More Articles


