
Adding a Vent in a Dropped Indoor Ceiling

When adding a dropped ceiling to a room, you need to take into account any vents or heating ducts that are functioning above it. If you don't make arrangements to incorporate these into your dropped ceiling, you will be heating and cooling the dead space over the ceiling. Fortunately, it's an easy job to extend vents and pipes so that they go through the dropped ceiling and send hot and cool air where it's supposed to go.
Step 01
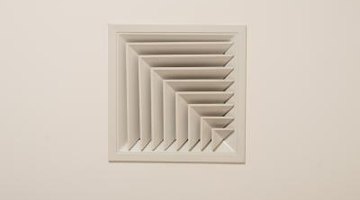
Measure the dimensions of your vent cover. Note that the vent cover has sides that will extend through the dropped ceiling panel and flanges that will be pressed against the face. Don't cut the hole to the size of the flanges, or the vent cover will go right through the hole. Cut the hole to the size of the sides so that they will pass through the hole and the flanges will press against the face of the panel, stabilizing the vent cover and hiding the edges of the hole.
Step 11
Remove the dropped ceiling panel from the location where you want the vent to go. Cut the desired size hole in the center of the panel with a sharp utility knife.
Step 21
Install the vent cover in the hole. Secure it to the vent cover using the method provided with the vent cover. These methods vary among products and may include butterfly clips, screws or spring catches.
Step 31
Pull the flexible vent pipe out through the hole in the dropped ceiling. If the vent that you are extending doesn't have a flexible vent pipe, buy one at any hardware or home improvement store and attach it to the existing vent.
Step 41
Connect the flexible vent pipe to the backside of the vent cover that you installed in the dropped ceiling panel. Tape them together using duct tape.
Step 51
Replace the panel in the dropped ceiling.
References
Resources
Writer Bio
Jagg Xaxx has been writing since 1983. His primary areas of writing include surrealism, Buddhist iconography and environmental issues. Xaxx worked as a cabinetmaker for 12 years, as well as building and renovating several houses. Xaxx holds a Doctor of Philosophy in art history from the University of Manchester in the U.K.
Photo Credits
- Jupiterimages/Photos.com/Getty Images
More Articles