How to Grout a Pebble Shower Floor
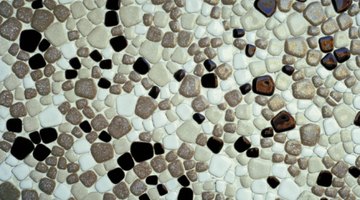
Pebble stone installed on a shower floor adds good looks. A common concern is if the product is comfortable for the feet. The pebbles selected for tile are sorted for thickness consistent enough to create a level surface. The pebbles attach to a flexible substrate that simplifies installation.

Things You Will Need
- Vacuum cleaner
- Sponge
- Sealer
- Bucket
- Sanded grout
- Margin trowel
- Grout float
Grouting methods for a pebble shower floor are generally the same as other types of floors.
-
Clean the pebble surface before grouting. Use a vacuum to remove any dirt and/or debris from the grout joints. Wipe the pebble surface with a clean, damp sponge to remove any haze left over from the thinset during installation.
-
Seal the pebble shower floor before grouting. Natural stone is a porous material that will absorb the pigments in the grout altering its natural color. Follow the manufacturer's instructions to apply the sealer.
-
Mix the grout in a clean bucket to the consistency of peanut butter, using a margin trowel. Use a sponge soaked in clean water to add water to the grout a little at a time until achieving the proper mixture. A typical, averaged-size shower floor will use less than 1/2 bag of grout. Pebble shower floors tend to use more grout because of a larger grout joint.
-
Transfer the grout to the pebble shower floor, using the margin trowel or grout float. Spread the grout, using a grout float over the pebble shower floor. Work the material into the grout joints, cracks and crevices completely filling them. Allow the grout to set up for approximately 20 minutes.
-
Smooth material in the grout joints, working the sponge in circular motions. The idea is to smooth the surface of the grout joints without removing too much grout material, keeping the joint full. Allow the grout to dry until a light haze develops on the pebbles' surface.
-
Remove the excess grout and haze by lightly wiping the surface with a clean, damp sponge. Pull the sponge in approximately 2-foot lengths, flipping it over to the clean side after each pass. The proper sequence is to wipe, flip the sponge over, wipe and rinse the sponge. Repeat this process until the floor is clean.
-
Seal the tile after allowing the shower floor to dry a minimum of 24 hours. Follow the manufacturer's instructions and cautions when applying the sealer.
Tip
When removing the haze, use only one side of the sponge at a time, keeping it clean by thoroughly rinsing in clean water.
Warning
Follow manufacturer's warnings when applying sealants.
Use sealers in a well-ventilated area.
Tips
- When removing the haze, use only one side of the sponge at a time, keeping it clean by thoroughly rinsing in clean water.
Warnings
- Follow manufacturer's warnings when applying sealants.
- Use sealers in a well-ventilated area.
Writer Bio
Robert Ferguson has been a writer since 2000. His published work includes material for major companies in the home improvement, plumbing, HVAC and power tool industry. Ferguson is a self-employed, licensed building contractor in Florida with more than 30 years of hands on experience experience focusing primarily on residential remodeling, repair, renovation and construction.
Photo Credits
- NA/AbleStock.com/Getty Images
- NA/AbleStock.com/Getty Images
More Articles


