How to Strengthen Trusses
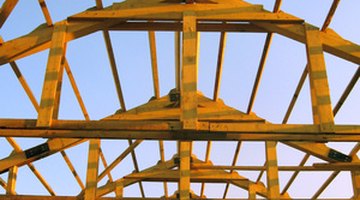
Trusses are made up of four main parts. The upper angled parts correspond to the common rafters used in stick framing roofs. These pieces are known as upper cords and there are two of them in each truss.

The bottom horizontal of the triangular truss form, which corresponds to the joists in stick framed roofs, is known as the lower cord. This open triangle requires bracing and the center vertical brace that supplies this is known as the king stud. To strengthen this frame shorter vertical bracing, known as cripples, can be added.
Things You Will Need
- Tape measure
- Drywall square
- 2-by-4 lumber
- Circular saw
- Cardboard
- 1/2-inch plywood
- Jig saw
- Construction adhesive
- Staple gun
-
Measure from the center of the truss to the outside corner. Divide this measurement in two and mark the spot. Repeat this measurement and marking on the opposite side of the truss. Use a large drywall square to mark the upper cord directly above the the mark on the lower cord. These two marks will serve to center the cripples.
-
Lay a 2-by-4 across the truss, with its bottom end, on the top edge of the lower cord and centered on the mark you made between the end of the truss and its center. Center the 2-by-4 on the mark on the upper cord as well, so that it extends from the lower cord at a 90 degree angle. Mark the 2-by-4 on both edges where it intersects with the upper cord.
-
Cut the 2-by-4 in line with the intersecting marks you made on the 2-by-4 with a circular saw. Cut a second identical piece to fit the other side of the truss. Align the cripples in the truss, with the flat bottom ends on top of the lower cord and the angled top cut aligned with the bottom edge of the upper cord.
-
Trace the joints at the top and bottom of each cripple onto cardboard. Cut the cardboard out with a utility knife. Use the cardboard as a template and trace the joint onto ½-inch thick plywood. Cut the plywood out with a jigsaw to create support plates or gussets to attach the cripples. Make two gussets for each top and bottom joint.
-
Apply construction adhesive to the plywood gussets and press them into place on the joints. Staple the gussets in place with 1½-inch staples. Apply gussets to both faces of the truss at the top and bottom of each cripple.
The Drip Cap
- Trusses are made up of four main parts.
- The upper angled parts correspond to the common rafters used in stick framing roofs.
- Center the 2-by-4 on the mark on the upper cord as well, so that it extends from the lower cord at a 90 degree angle.
- Use the cardboard as a template and trace the joint onto ½-inch thick plywood.
- Cut the plywood out with a jigsaw to create support plates or gussets to attach the cripples.
- Apply gussets to both faces of the truss at the top and bottom of each cripple.
References
- “Rough Framing Carpentry”; Mark Currie; 1993
- “Builder's Essentials: Framing and Rough Carpentry”; Scott Simpson; 2001
Writer Bio
Mark Morris started writing professionally in 1995. He has published a novel and stage plays with SEEDS studio. Morris specializes in many topics and has 15 years of professional carpentry experience. He is a voice, acting and film teacher. He also teaches stage craft and lectures on playwriting for Oklahoma Christian University.
Photo Credits
- new roof image by Florin Capilnean from Fotolia.com
- new roof image by Florin Capilnean from Fotolia.com
More Articles


