How to Rebuild a Wall in Your Home
Interior walls are either load-bearing or non-load-bearing. Non-load-bearing walls are essentially partitions and they can be torn down and replaced with impunity. Load-bearing walls support some part of the overhead structure and they must be functionally replaced with timbers before they can be removed.

Things You Will Need
- Claw hammer
- Steel measuring tape
- 2-inch-by-4-inch boards
- Circular saw
- C-clamps
- Pencil
- T-square
- 10 penny nails
- Sheetrock or lath and plaster
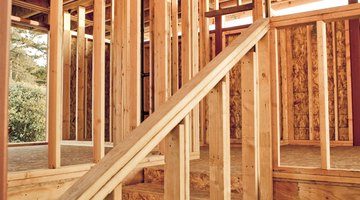
Virtually all American homes built in the last 120 years are “stick homes.” Stick homes are built from a frame of 2-inch-by-4-inch studs, instead of from heavier timbers -- post and beam construction -- or masonry. Your interior wall is a series of 2-inch-by-4-inch boards that are arranged with 16 inches of distance between each stud.
-
Remove the plasterboard or plaster and lath that covers both sides of your existing wall with a claw hammer to expose the interior structure. Decide what you want to replace and what you do not. Your wall may enclose water lines, gas lines or electrical lines.
-
Measure the horizontal distance your new wall will occupy with a steel measuring tape. It will either be the length of your old wall or some improvement of it. The 2-inch-by-4-inch board that runs along the top of your wall is called the top plate. The one on the bottom of the wall is called the sole plate. The boards that connect the two plates are called studs.
-
Cut two plates from new boards with a circular saw to the appropriate length for the rebuilt wall. Lay the plates side by side on the floor with the broader sides of the boards down.
-
Clamp the two plates together with C-clamps. Measure 16 inches from the end of the two plates and draw a straight pencil line there across both plates using a T-square.
-
Lay one 2-inch-by-4-inch board on its 1.5-inch edge flush against the end of the two plates -- 2-inch-by-4-inch boards actually measure 1.5 inches by 3.5 inches. Draw a pencil line on the other side of the board that crosses both plates.
-
Move the board to the pencil line 16 inches away and draw a series of 1.5-inch rectangles across both plates all the way to their ends. The rectangles mark exactly where the studs will go.
-
Count the rectangles. That number is how many studs you must cut.
-
Measure the height of your wall opening from floor to ceiling with the tape measure. Cut each stud 3 inches smaller than the wall opening you measured, because the total height of the two plates is 3 inches. Cut as many studs as you have rectangles on each plate.
-
Unclamp the plates. Working one stud at a time, butt the studs against the top plate so that each one exactly fills one of the rectangles.
-
Nail two 10 penny nails through the top of the top plate into the top of each stud using a claw hammer.
-
Remove the old wall. Nail the bottom plate in place to the floor or subfloor using 10 penny nails and a claw hammer. Nail the plate in place with the rectangles you drew facing up so you can see them.
-
Lift the partially constructed wall frame, the top plate and the studs, into place with the aid of assistants, if necessary.
-
Nail the top plate to the joists using 10 penny nails and a claw hammer. The joists should have nail holes from the old top plate.
-
Working on one stud at a time, arrange the studs so they exactly fit into the rectangles you drew on the sole plate.
-
Drive 10 penny nails at a 60-degree angle through the side of each stud into the bottom plate. This technique of driving nails through the studs at an angle to secure them to the sole plate is called “toe-nailing.”
-
Cover the wall frame with Sheetrock or lath and plaster.
Tip
Only replace as much of your existing wall as you need to replace.
Warning
Removal of gas, electrical or water lines requires a building permit and may have to be performed by a licensed plumber or electrician.
References
Tips
- Only replace as much of your existing wall as you need to replace.
Warnings
- Removal of gas, electrical or water lines requires a building permit and may have to be performed by a licensed plumber or electrician.
Writer Bio
Don Davis has been a professional writer since 1977. He has had numerous writing jobs, including writing news and features for the "Metrowest Daily News" and "Los Angeles Herald-Examiner." Davis has a Bachelor of Arts in English and history from Indiana State University.
Photo Credits
- Hans Hansen/Lifesize/Getty Images
- Hans Hansen/Lifesize/Getty Images
More Articles


