
How to Use Adhesive on a Dry-Stack Wall

Stone walls have been in use for centuries, and when built properly, require nothing more than gravity to hold them in place. In modern times, there have been numerous adhesive products, ranging from concrete to construction glue, which are used to aid in the overall building of the wall.
Things You Will Need
- Adhesive
- Caulking gun
- Utility knife
- Rubber mallet
- Level
- Towel
- Stiff-bristle brush
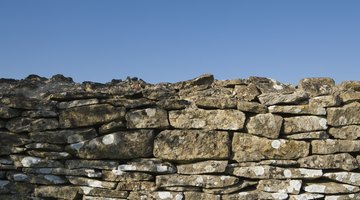
When working against a dry-stack wall, either with blocks, bricks or rock, the goal is to have the glue or adhesive remain out of sight, leaving you with what looks to be a stacked stone wall. In reality, there is something more helping secure the stability of the wall.
-
Load the caulking gun with your chosen adhesive. Cut the tip of the tube of adhesive off with a utility knife. Leave at least a 1/4-inch-wide hole in the tip.
-
Apply adhesive to the bottom sides of the first layer of stone to go down, as well as on their sides where the pieces meet up together. Squeeze the adhesive out of the caulking tube tip slowly, and apply an even seam of adhesive with the tip. For stone, keep the adhesive on the back edge of the sides only.
-
Ensure the adhesive is at least 1 inch away from the face of the material on stacked blocks and bricks, to avoid excess squeezing out and becoming visible through the front joints.
-
Tap the pieces into place against one another with the rubber mallet. Use the level to ensure the face of the installation is plumb from side to side as well as up and down. Wipe up any excess adhesive that squeezes out by accident with a spare towel.
-
Work your way up the wall until you are finished, stacking the stones as you would normally, and adding glue to them. Alternate rows so the vertical seams never line up.
Tip
For best results, use a stiff brush to briskly clean the backs and sides of each block, brick or stone for better adhesion of the adhesive.
Resources
Tips
- For best results, use a stiff brush to briskly clean the backs and sides of each block, brick or stone for better adhesion of the adhesive.
Writer Bio
Tim Anderson has been freelance writing since 2007. His has been published online through GTV Magazine, Home Anatomy, TravBuddy, MMO Hub, Killer Guides and the Delegate2 group. He spent more than 15 years as a third-generation tile and stone contractor before transitioning into freelance writing.
Photo Credits
- Jupiterimages/Polka Dot/Getty Images
- Jupiterimages/Polka Dot/Getty Images
More Articles