
How to Make Your Own Fluorescent Light Diffuser Panels

Bare, naked fluorescent lights provide strong, white light that can be too glaring at times, particularly depending on how the light spills onto the space. With a few minor, inexpensive changes to a diffuser panel, you can soften the light and even add some drama to the room.
Fluorescent lights can be on the ceiling, on a wall or on the floor, so there are different methods of creating an effective diffuser panel that is also pleasing to the eye.
Things You Will Need
- Glass tile panel the same size as your diffuser panel
- Long, rectangular wooden hedge box
- Home saw
- Screw driver
- Strong wood glue
- 2 L-brackets with screws
- Paint
- Paintbrush
- Wallpaper remnant, enough to cover the planter hedge box
- Stencil
- Contact paper
- Craft knife
- Watercolor
- Watercolor brushes
- Small cup of water
- Glass blocks, enough to span the length of your fluorescent light
- Fluorescent light dimensions
- Diffuser area dimensions
Tip
Glass options can be ordered to fit your size at low cost. Square glass tiles can even be bought as remnants for an even lower price. Planter hedge boxes and L-shaped brackets can be painted over with contrasting color. Alternatively, the hedge box could also be finished with wallpaper to create visual interest. Planter hedge boxes function like long sconces and look good over a bed head board, a couch or a hallway. Glass blocks come in various sizes, so have your fluorescent light dimensions and diffuser area on hand when buying.
Warning
Handle glass with care.
-
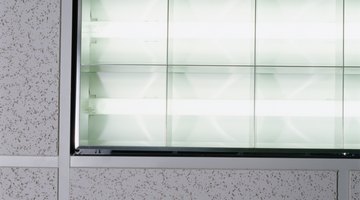
Replace your current plain acrylic diffuser with textured glass, stained glass, etched glass or alabaster tile. This alternative works especially well if the fluorescent light is a ceiling light. Opaque white textured glass or alabaster creates the softest glow with the brightest light; etched glass has pockets of very bright light and “barely-there” light, depending on how much etching was used; colored or stained glass diffuses your light the most, and casts interesting colored shadows that give a semblance of drama and mystery to an otherwise bland space.
-
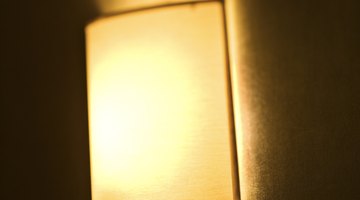
Modify a long rectangular wooden planter hedge box--a good alternative if the fluorescent light is mounted on a wall. Remove one long panel for light to be upwardly directed, creating a diffused glow; remove one long panel and the bottom panel for light diffusion upward and downward. Attach the box over the light with strong glue or L-shaped brackets; it should look like a long sconce.
-
Enhance your acrylic panel diffuser; trace a stencil over contact paper, cut out the pattern with a craft knife and attach to the inner panel. Paint the whole panel with watercolor; when dry, peel off the contact paper. Watercolor is translucent and allows some light through, creating a diffused glow.
-
Use glass blocks with any interesting pattern and color of your choice over a floor light source (clubs, executive suite hallways, upscale homes). Glass tiles are not a safe option where feet can kick in a crack.
The Drip Cap
- Bare, naked fluorescent lights provide strong, white light that can be too glaring at times, particularly depending on how the light spills onto the space.
- Enhance your acrylic panel diffuser; trace a stencil over contact paper, cut out the pattern with a craft knife and attach to the inner panel.
Writer Bio
Loi Diaz has been a home stager, copywriter and scriptwriter since 1983. She has written for Junior Citizen Publications, McCann-Erickson and Ogilvy & Mather. Fluent in two languages, Diaz holds a Bachelor of Arts in broadcast communications from the University of the Philippines, as well as Canadian certificates in home staging and design.
Photo Credits
- Ryan McVay/Photodisc/Getty Images
- Ryan McVay/Photodisc/Getty Images
- Hemera Technologies/AbleStock.com/Getty Images
- Thinkstock/Comstock/Getty Images
More Articles