How to Install Attic Rafter Vent Baffles
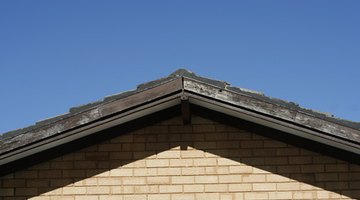
Attic rafter vent baffles are essential for the health of your roof. Soffit vents are the small metal or plastic grates you probably have seen under the eaves of houses. They allow the fresh air to travel up under the roof to the ridge or gable vents, keeping the roofing materials dried out and in good working order.

A a rafter vent baffle prevents insulation and other debris from clogging the airway, preventing proper attic ventilation.
Things You Will Need
- Rafter vent baffles
- Small plastic construction flags
- 3/4-inch plywood
- Flashlight
- Long sleeves
- Gloves
- Goggles
- Staple gun
Tip
Wear long sleeves, gloves and goggles to prevent irritation from the insulation. It is best to conduct this project when the weather is mild; hot conditions outdoors can be unbearable and potentially dangerous inside the attic.
-
Locate the soffit vents in the eaves of your home. It may be easiest to locate and mark them from below. Use a sprinkler or other small construction flag on a wire stem to poke up through the vent from below into the attic. These brightly colored flags fall into the attic on top of the insulation, marking the location of a vent. Do this for each soffit vent you locate.
-
Measure the distance between your rafters, and purchase enough rafter vent baffles to install one over each soffit vent. They come in several widths, so purchase the baffle that fits between your rafters. Cut at least two 24-inch squares of ¾-inch plywood to use as seat boards when crawling out into the attic.
-
Collect baffles, staple gun and flashlight before crawling out into the attic. Use the plywood squares sitting firmly on top of attic rafters to crawl out to the end of the rafter wherever you see one of your flags from below. If flags were not used, turn off your flashlight and any other lights, allow your eyes to adjust and look for light shining up through the soffit vent onto the underside of the roof. Move slowly and make sure to position your plywood seat boards carefully; avoid putting weight on the drywall or the ceiling below.
-
Clear any insulation or other debris away from the top of the grate of the soffit vent. Place the rafter vent against the underside of the roof with one narrow end resting against the top of the soffit vent grill. Place the baffle so that the open channel, which runs along its underside is against the roof. Staple along both edges every 4 to 6 inches to firmly attach the baffle to the roof. Repeat this procedure for each soffit vent, rolling any moved insulation back against the baffle to prevent it from blocking the grill.
The Drip Cap
- Attic rafter vent baffles are essential for the health of your roof.
- Soffit vents are the small metal or plastic grates you probably have seen under the eaves of houses.
- Use a sprinkler or other small construction flag on a wire stem to poke up through the vent from below into the attic.
- Measure the distance between your rafters, and purchase enough rafter vent baffles to install one over each soffit vent.
- Repeat this procedure for each soffit vent, rolling any moved insulation back against the baffle to prevent it from blocking the grill.
References
Writer Bio
Mark Morris started writing professionally in 1995. He has published a novel and stage plays with SEEDS studio. Morris specializes in many topics and has 15 years of professional carpentry experience. He is a voice, acting and film teacher. He also teaches stage craft and lectures on playwriting for Oklahoma Christian University.
Photo Credits
- roof image by Christopher Meder from Fotolia.com
- roof image by Christopher Meder from Fotolia.com
More Articles


