How to Replace a Mailbox in the Winter
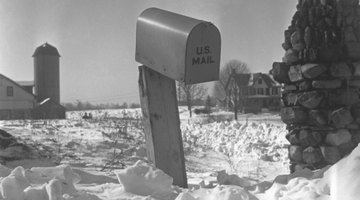
The winter months can wreak havoc on your mailbox. Vehicles sliding on the ice, snowplows trying to clear the roads and the extra weight of snow and ice can snap and crack your mailbox and post, damaging them beyond repair. Before you can install a new mailbox, you must remove the old post and box.

This can be a difficult task during the winter season. The dropping temperatures typically freeze the ground, which makes digging a strenuous task. Using a pickax instead of a shovel can aid in removing the post.
Things You Will Need
- Shovel
- Pickax
- Heavy-duty chain
- Prefabricated mailbox post with arm
- Wood screws
- Electric screwdriver
- 2 boards, 1-by-3-inches
- Hammer
- Mallet
- 2 wooden stakes
- 2 bags quick-setting concrete mix, 50-lbs. each
- 3/4-inch-thick board
- Saw
Tip
Purchase a replacement mailbox kit at a hardware store that includes the necessary hardware and instructions for attaching it to the post.
Warning
Check with your local post office for curbside mailbox regulations governing the height and distance from the road.
-
Pour hot water -- a gallon at a time -- over the frozen ground around the mailbox post to help soften it.
-
Dig three to four inches around the damaged mailbox post with a shovel, or a pickax if the ground is frozen. Move the post in a back-and-forth motion to loosen it from the ground.
-
Attach a heavy-duty chain around the damaged mailbox post. Secure the other end of the chain to a truck hitch or a four-wheeler. Press the vehicle's gas pedal gently until the chain is taut, then slowly continue until the force of the vehicle jerks the damaged mailbox post out of the ground.
-
Clean dirt and other debris from inside the post hole. Place the prefabricated post with mailbox arm in the center of the hole. Support the post in position by angling one of the 1-by-3-inch boards from one side of the post to the ground. Secure the board to the post with wood screws and a screwdriver. Attach the other board to the opposite side of the post and angle it away from the post. Make sure the braces are perpendicular.
-
Pound a wooden stake near the base of each board. Screw each board to its wooden stake to secure the braces. Make sure the post is standing straight.
-
Dump one 50-pound bag of quick-setting concrete mix into the posthole. Pour 1 gallon of water into the hole. Mix the contents with a shovel.
-
Dump a second bag of the quick-setting concrete mix and another gallon of water into the posthole. Mix well with the shovel. Allow the concrete to set for 24 hours.
-
Cut a 3/4-inch-thick board long enough to run under the bottom of the mailbox, using a saw. Secure it to the arm of the post with several screws. Attach the mailbox to the post using the included hardware. Fill the posthole with top soil.
The Drip Cap
- The winter months can wreak havoc on your mailbox.
- Vehicles sliding on the ice, snowplows trying to clear the roads and the extra weight of snow and ice can snap and crack your mailbox and post, damaging them beyond repair.
- This can be a difficult task during the winter season.
- Dig three to four inches around the damaged mailbox post with a shovel, or a pickax if the ground is frozen.
- Secure the board to the post with wood screws and a screwdriver.
- Make sure the braces are perpendicular.
- Dump a second bag of the quick-setting concrete mix and another gallon of water into the posthole.
References
Writer Bio
Amanda Flanigan began writing professionally in 2007. Flanigan has written for various publications, including WV Living and American Craft Council, and has published several eBooks on craft and garden-related subjects. Flanigan completed two writing courses at Pierpont Community and Technical College.
Photo Credits
- George Marks/Retrofile/Getty Images
- George Marks/Retrofile/Getty Images
More Articles


