How to Construct a Chimney Chase
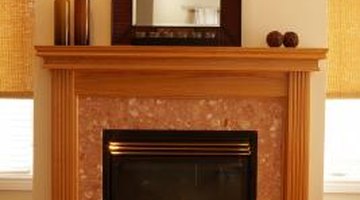
A chimney chase is essentially a bumped-out area of framing that hides a metal or cement-block chimney in a fireplace. You build the chimney chase much like any other wall framing by placing your studs between sole plates and top plates to create a large box. A header -- essentially a 2-by-4 crosspiece -- on the front of the chase creates an opening for the fireplace or insert.

Step 1
Sketch the dimensions of the chase if you don’t have an architectural drawing to follow. Allow at least the minimum clearance specified by the fireplace manufacturer between the chase and the chimney. Your chase is likely to be at least 6 feet wide, which allows for a mantel, stone facing and gas line access, and 2 to 3 feet deep, based on the manufacturer’s specifications.
Step 2
Mark the dimensions on the ceiling measured out from the wall. Drop a plumb bob from the top corners to the floor and mark these spots. Snap chalk lines on the ceiling and floor to mark the chase dimensions.
Step 3
Saw 2-by-4 lumber to serve as the top and sole plates for the front and sides of the chase. Lay these on the floor. Mark the stud locations every 16 to 24 inches. Stack two 2-by-4 blocks on the floor and measure up to the ceiling chalk line to arrive at your stud measurements -- the blocks account for the thickness of the sole and top plates.
Step 4
Cut full studs for the sides of the chase. Cut a header to run between the front studs above the fireplace opening. Cut shorter cripple studs -- those that don't run the full distance to the floor -- for the front to fit between the top plate and the header.
Step 5
Lay out the pieces for the front of the chase on the floor on their narrow edges. Drive in two 16d nails to connect the full-length studs to the top and sole plates. Nail the header at the manufacturer’s specified height above the sole plate. Nail cripple studs between the header and the top plate. Create the sides of the chase by nailing the top and sole plates to the full-length studs at each location you marked previously.
Step 6
Raise the front of the chase in place with the help of an assistant if necessary. Check that the chase is plumb with a level. Nail the top plate to the ceiling joists through every stud bay. Nail the sole plate into each floor joist. Raise the sides of the chase in place, check for level then nail them in place.
Step 7
Have your fireplace installer create a fire block at the top of the chase with 3/4-inch plywood as part of the flue installation. Cover the chase, after the fireplace installation, with 1/2-inch OSB or plywood to allow sufficient bracing for your finish, especially if you plan to add heavy stone facing.
Resources
Writer Bio
An award-winning writer and editor, Rogue Parrish has worked at the Washington Post, the Baltimore Sun and at newspapers from England to Alaska. This world adventurer and travel book author, who graduates summa cum laude in journalism from the University of Maryland, specializes in travel and food -- as well as sports and fitness. She's also a property manager and writes on DIY projects.
Photo Credits
- Jupiterimages/Photos.com/Getty Images
More Articles


