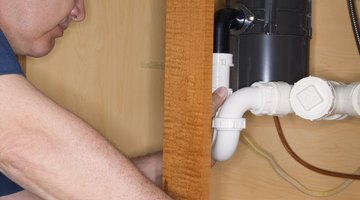
How to Remove the Sinkmaster Locking Ring
Sinkmaster garbage disposals are part of Anaheim Manufacturing Company's Waste King product line. Sinkmaster disposal units connect to sink basin strainers with either a three-bolt mounting flange or a slide-and-lock mounting flange.

Things You Will Need
- Screwdriver
- Hammer
As suggested by its name, the three-bolt assembly features a set of three threaded rods. The slide-and-lock assembly has a smooth-sided mounting ring with a set of tabs or "ears" protruding from its exterior. With careful attention to the order of dismantling, removing both types of mounting assemblies requires little time and effort.
Three-bolt Mounting Assembly
-
Unplug the disposal unit or turn off the disposal's breaker at the main circuit panel. Loosen and remove any drainpipe or dishwasher connections to the disposal unit. Locate the rubber cushion that connects the top opening of the disposal unit to the lower opening of the strainer flange. Insert a screwdriver into the cushion's clamp screw.
-
Support the disposal unit from beneath with one hand. Turn the screwdriver counterclockwise to loosen the screw and clamp. While supporting the disposal unit from beneath, grasp the rubber cushion and gently wiggle and pull it to release the disposal unit from the sink strainer flange. Remove the disposal unit.
-
Insert a screwdriver into one of the three-bolt mounting ring's bolts. Support the mounting assembly from beneath with one hand. Turn the screwdriver counterclockwise to loosen the bolt. Loosen the bolt until its shank releases from the sink strainer flange. Loosen the remaining bolts and remove the mounting assembly from the sink strainer's shaft. Remove the remaining protector ring and rubber gasket from the sink strainer's shaft.
Slide-and-Lock Assembly
-
Unplug the disposal unit or turn off the disposal's breaker at the main circuit panel. Loosen and remove any drainpipe or dishwasher connections to the disposal unit. Locate the tabs or "ears" that surround the disposal unit's slide-and-lock mounting ring; the mounting ring attaches to the top opening of the unit.
-
Tap one of the tabs counterclockwise with a hammer. Lightly tap the tab until the ring loosens and twists counterclockwise. Tap an adjacent tab if necessary. Support the disposal unit from beneath with one hand and twist the ring with the other. Twist the ring until the disposal unit releases from the sink strainer's shank. Remove the disposal unit.
-
Shimmy the smooth-sided cushion mount off the end of the sink strainer's shaft. The cushion mount is a metal ring with an interior lining of rubber. Pull the remaining mounting ring from the strainer's shaft. The remaining ring is the portion of the assembly that accepted the disposal's tabs.
-
Twist the support ring counterclockwise. The support ring is a threaded, nut-like component that butts against the underside of the sink basin. Loosen and remove the support ring. Pull the fiber gasket from the sink strainer's shank.
Tip
Consult your Sinkmaster owner's manual for diagrams and in-depth descriptions of mounting assembly components.
Warning
Do not pound the mounting ring's tabs with the hammer. If you accidentally damage the tabs or deform the mounting ring's threads, removing the disposal components will be more difficult.
References
Writer Bio
Based in Hawaii, Shane Grey began writing professionally in 2004. He draws on his construction experience to write instructional home and garden articles. In addition to freelance work, Grey has held a position as an in-house copywriter for an online retailer. He holds a Bachelor of Arts in theater arts from Humboldt State University.
Photo Credits
- Jupiterimages/liquidlibrary/Getty Images
- Jupiterimages/liquidlibrary/Getty Images
More Articles


