How to Create a King Bed Connector

How to Create a King Bed Connector
Written By
Tiana Mortimer
Tiana Mortimer
Published: Jun 10, 2009
Updated: Nov 20, 2021
1 minute read
  1. Assemble the bed frame to accommodate the two twin box springs. Pliers may be needed to tighten any screws.

  2. Place both twin box springs on the bed frame and then position the twin bed mattresses on top.

  3. Ratchet lashing strap
  4. Wrap the ratcheting lashing strap around the perimeter of the beds; slide the end of the strap into the ratcheting mechanism and pull through.

  5. Ratchet the lever mechanism up and down, as this action will tighten the lashing strap around the bed. The tightened strap will keep the twin beds together and prevent sliding or separation.

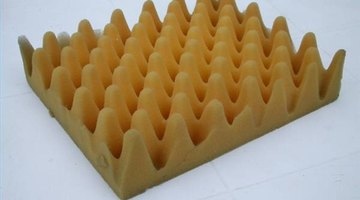
  6. Egg carton foam
  7. With the measuring tape, measure a 1 foot wide by 100 inch long piece of egg carton foam and cut out the piece with scissors.

  8. Position the foam lengthwise down the middle seam of the bed where the twin mattresses meet. Tuck the ends of the foam under the lashing strap holding the mattresses securely together.

  9. Make your bed with the king-size bedding.

Resources

Tips

Consider using 1-inch thick memory foam instead of egg carton foam for a longer-lasting bed seam cover. Top your "new" king-size bed with a 1-inch mattress topper for a more uniform sleeping surface. Make sure the ratcheting mechanism of the lashing strap is hidden behind the bed, away from view.

Warnings

Do not use a ratcheting lashing strap with any hooks or loops, are they are bulkier and may interfere with tucking in the bedding.

Photo Credits

Hidetsugu Tonomura, Eric Mortimer, Jean Jacques-Milan

Tiana Mortimer

Tiana Mortimer has been Executive Director for a nonprofit boychoir organization since 1999 and a freelance writer since 2004. Her nonprofit work has been published in a variety of regional publications and she has ghostwritten hundred of…

Sponsored
HomeSteady Logo

HomeSteady is the ultimate guide for all your household needs, from cleaning and HVAC to electrical, DIY and maintenance.

Property of TechnologyAdvice. © 2026 TechnologyAdvice. All Rights Reserved

Advertiser Disclosure: Some of the products that appear on this site are from companies from which TechnologyAdvice receives compensation. This compensation may impact how and where products appear on this site including, for example, the order in which they appear. TechnologyAdvice does not include all companies or all types of products available in the marketplace.