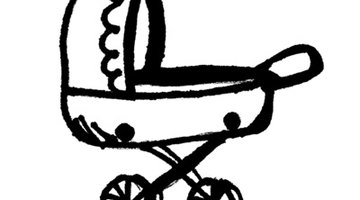
How to Restore Baby Carriages
Standard strollers of today look markedly different from the regal baby carriages of the past. The original wood and metal elements in a baby carriage have been replaced by cheaper and more durable plastic parts, and the crisp, clean fabric that traditionally lined baby carriages has taken a back seat to contemporary prints and colors. Old baby carriages are a thing of beauty, but many of these antiques have been used and abused, leaving them far from their original polished status. You can easily refinish an old baby carriage, and restore it to its original glory.

Step 1
Remove any fabric from the carriage carefully. Using a seam ripper, remove the seams holding the cover and all of the padding from the carriage. If this material is still in good shape, you can reuse it. If not, use the material as a pattern to create new fabric pieces.
Step 2
Strip the wood. Using a liquid or paste wood-stripping chemical, remove the paint or varnish from wooden parts of the carriage.
Step 3
Sand the wooden parts with low grit sandpaper to smooth any rough sections or remove any remaining paint or varnish residue. Fold the sandpaper, and push it gently into any nooks or crannies.
Step 4
Repaint or stain the carriage. Select a paint color or stain, and paint or stain the wooden parts of the carriage.
Step 5
Varnish the wooden parts of the carriage to create a smooth, polished look.
Step 6
Polish any metal elements. Determine what metal the metallic parts are made of, and polish the parts using a polish intended for that type of metal.
Step 7
Patch or purchase new wheels. Remove the wheels from the carriage, and patch them if necessary. If they are beyond repair, visit a local bike store and seek assistance in selecting wheels of a similar size with which to replace the original wheels.
Step 8
Create new fabric elements. If the carriage cover and padding appear too worn, even after washing, use a seam ripper to take the old pieces apart, and lay them on new fabric. Use the original pieces as a pattern, tracing around them to cut out and sew new fabric liners and covers for the carriage.
Step 9
Install the liners and cover. Using the same stitching method originally used to affix the liners and covers, replace the old fabric with the restored or recreated fabric elements.
References
Writer Bio
Erin Schreiner is a freelance writer and teacher who holds a bachelor's degree from Bowling Green State University. She has been actively freelancing since 2008. Schreiner previously worked for a London-based freelance firm. Her work appears on eHow, Trails.com and RedEnvelope. She currently teaches writing to middle school students in Ohio and works on her writing craft regularly.
Photo Credits
- kinderwagen image by Ewe Degiampietro from Fotolia.com
More Articles


