
Trimming an Outlet on Vinyl Siding

Vinyl siding is an economical building material that has become popular in many parts of the United States. The product consists of a series of channels and trim pieces that hold the interlocking siding panels in place. Trimming an electrical outlet on vinyl siding should be done before the siding panels are installed. A specialized accessory called a J-block serves the dual purpose of housing and trimming the outlet, and also securing the vinyl siding panels. A rectangular hole is cut into the siding to facilitate the placement of the J-block.
Preparing the Outlet Before Trimming
-
Shut off the power to the outlet you are working with.
-
Cut a rectangular hole in the vinyl siding panels over the electrical outlet. Use tin snips and make the opening large enough to accommodate the base of the J-block within which the junction box and electrical outlet will be nested. Use a vinyl panel unlocking tool to separate panels and gain access for cutting.
-
Unfasten the outlet and junction box from the framework of the house.
-
Disconnect the wiring to the electrical outlet and remove the outlet from within the junction box. Now you should have only an electrical wire hanging out of the opening.
Trimming the Outlet
-
Separate the two pieces of the J-Block. The J-Block consists of a base and a trim plate. Set the trim plate aside while you work with the J-Block base.
-
Nest the junction box within the J-block base. If need be, mark and cut an opening in the base of the J-block through with the clamp on the black of the electrical outlet will fit. Also, you may need to snap off the metal tabs on the sides of the electrical outlet. Generally, these are used to fasten the outlet to the framework of the house. Use pliers to remove these tabs if they impede the outlet from nesting properly within the J-Block.
-
Drill holes through the base of the junction box and through the J-Block. Make the holes wide enough to accommodate the screws you will use to mount the J-Block to the house.
-
Run your electrical wire through the hole in the J-Block; then fasten the J-Block to the house using corrosion-resistant nails. Drive the nails so that the J-Block is held securely, but don't hammer them down so tightly that the vinyl warps. Because vinyl expands greatly in heat, whenever nailing vinyl pieces, leave 1/32 to 1/16 inch of the nail shafts exposed.
-
Run the electrical wire through the clamp and hole in the junction box. Leave about 4 to 6 inches of wire exposed, and tighten the screws on the clamp so the wire is held firmly in place.
-
Run a bead of caulk around the back edges of the junction box and position it inside the J-Block. The caulk will prevent water from leaking into the outlet.
-
Mount the junction box to the J-Block with corrosion-resistant screws.
-
Attach the top cover of the J-Block to the base. The pieces will snap together and form a secure bond.
-
Wire the electrical outlet and position it inside the junction box. Fasten the outlet to the junction box by running provided screws through the existing screw holes in the junction box.
References
Warnings
- Always take extreme care when working with electricity. When in doubt, call a professional.
Writer Bio
Robert Howard has been writing professionally since 2004 and writes a weekly column for the "Synthesis," a Chico, Calif.-based newspaper. He maintains a blog and has published articles and works of fiction in a variety of different print and online magazines. Howard holds a Bachelor of Arts in visual arts from the University of California, San Diego.
Photo Credits
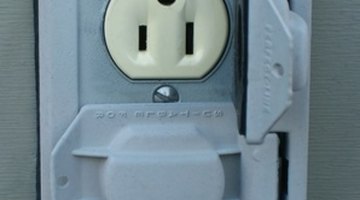
- outlet image by Albert Lozano from Fotolia.com
More Articles