
How to Take a Bit Tip Out of a Cordless Screwdriver

Cordless screwdrivers have quite a few advantages over their plug-in counterparts; they're lighter, for one thing, and can also literally be taken far beyond where a long, easily tangled power cord can reach. Because of these features, cordless screwdrivers are perfect for use in indoor and outdoor home repair for the experienced and beginner handy person. Whether your cordless screwdriver uses a bit key or not for bit tip insertion and removal, changing bit tips is a quick and easy process.
-
Pull the bit tip out. On some cordless screwdriver models, removing a bit tip requires a simple tug on the exposed end. If you are switching between a flat and a Phillips head screwdriver tip, they are often on opposite ends of the same tip, and all you need to do is turn the bit tip around and reinsert.
-
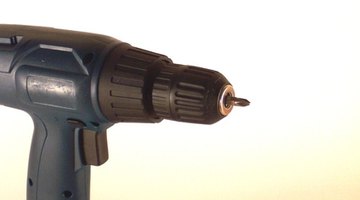
Hand loosen the grip. Other cordless screwdriver models, like the one in the picture, require the operator to grasp the round ridged tightener behind the bit tip and twist counter-clockwise until the clamps holding the bit tip in place are loosened enough to release it.
-
Use a bit key. Older cordless screwdrivers may require the use of a bit key to remove bit tips. There will be a small metal opening with threads in the round ridged tightener where you insert the corresponding end of the bit key. Turn the bit key counterclockwise to start the bit tip loosening process. Once the tightener is loosened, you can loosen it further by hand until the bit tip is easily removed.