
How to Build a Cabinet With Shelf Pegs

Use shelf pegs to build cabinets with adjustable shelves. It's an affordable way to add movable shelves to almost any cabinet. Shelf pegs install into drilled holes in both sides of the cabinet. They typically have a 3/8-inch peg with a 90-degree lip to provide support for the shelf.
The cabinet is assembled without the shelves, which are added after the cabinet is assembled. This makes the cabinet lighter and easier to build. Typically, shelf peg cabinets are only used on upper cabinets, although there's no reason why you can't use them on base cabinets.
Measure and Cut
Start by measuring and cutting the sides, top and bottom of the cabinet using a table saw. Lay the parts out on their edges in the shape of the cabinet with the sides overlapping the edges of the top and bottom. Use a pin nailer to attach the sides to the top and bottom, shooting at least six 1 1/2-inch pin nails evenly spaced through the sides to penetrate into the top and bottom on all four sides. If the cabinet is to be used only for utility or storage purposes, such as a garage cabinet, use 1 1/2-inch staples for better holding power. Pin nails are always used on finished hardwood cabinets because they leave a tiny hole that's easily filled with putty.
Back and Doors
Use a table saw to cut a piece of either hardboard or 1/4-inch plywood the same size as the box. Apply glue to the edge around the perimeter of the box. Place the back on the box, and use a staple gun to shoot 3/4-inch staples around the perimeter spaced four inches apart. You can also use 3/4-inch screws and a drill/driver to attach the back to the box if desired. Display cabinets with shelf pegs are often built without doors, but if doors are desired, cut a single piece of plywood the same size as the outside edges of the box. If the opening is over 24 inches wide, split the plywood in half to make two doors. You have two choices for hinges: concealed, which install on the inside of the cabinet; or piano hinge, which install on the outside. Use concealed hinges for finished cabinets. Piano hinge is typically used on utility cabinets. Hang the doors on the cabinet after the shelf pegs and shelves are installed.
Drill Holes
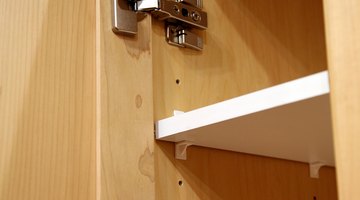
The shelf peg system allows the shelves to be placed inside the cabinet at one-inch vertical spacings. Each shelf is supported by four shelf pegs: two on each side. Drill the shelf peg holes in the sides by first making a 2-inch wide template out of 1/4-inch hardboard. Cut the hardboard to the height on the inside of the cabinet. Measure and mark one-inch spacings centered on the template. Drill one hole at each mark using a 3/8-inch drill bit and drill/driver. Stand the template flush with the front edge of the cabinet. Using the holes as a guide, drill into the sides of the cabinet at each hole to a depth of 5/8 inch. Place a piece of tape on the drill bit to indicate the proper depth. Drill all four edges, front and back to produce evenly matched holes on both sides of the cabinet for the shelf pegs.
Shelves and Pegs
Measure the width and length of the cabinet on the inside. Cut the shelves 1/4 inch smaller than the measurements. This is to prevent the shelves from binding when you install or reposition them. Cut the shelves to size using a table saw. Place the shelf pegs in the holes. The round cylinder part of the peg fits into the hole. It may be tight; use a small block of wood to tap the cylinder into the hole if necessary. The flat 90-degree lip on the peg faces up to support the shelf. Another lip on the peg fits tight against the side of the cabinet. Count the number of holes if necessary on both sides to get the spacings right. Place the pegs in corresponding holes on both sides. Place the shelves on the pegs. If you plan on painting or finishing the cabinet, do it before installing the shelves and doors.
Writer Bio
Specializing in hardwood furniture, trim carpentry, cabinets, home improvement and architectural millwork, Wade Shaddy has worked in homebuilding since 1972. Shaddy has also worked as a newspaper reporter and writer, and as a contributing writer for Bicycling Magazine. Shaddy began publishing in various magazines in 1992, and published a novel, “Dark Canyon,” in 2008.
Photo Credits
- Jupiterimages/Photos.com/Getty Images
- Jupiterimages/Photos.com/Getty Images
More Articles