How to Make Crown Molding Corner Blocks
Crown molding adds elegance to any room in a home, but is harder to install than other molding types because of the multiple angle cuts required to get a perfect finished product.

Making and installing corner blocks makes the crown molding installation process easier because it eliminates cutting or coping the mitered angle cuts. Instead, the molding will butt right up to the corner blocks to form a perfect corner that is easy to install.
Things You Will Need
- Measuring tape
- Pencil
- 8 feet of crown molding
- 4-inch by 4-inch board, 4 feet long
- Miter saw
- Router table
- Decorative router bit
- 120-grit sandpaper
- Clean rags
- Paint brush
- Paint or stain
-
Cut a small piece of crown molding with a miter saw. Hold it in place against the ceiling and the wall. Measure the distance from the ceiling down to the bottom of the crown molding. Measure the distance that the crown molding sticks out from the wall to its furthest point. The corner block you make will be 2 to 3 inches longer than the ceiling-to-bottom-molding distance, and will be 1/4 inch deeper than the width of the molding.
-
Cut the 4-inch by 4-inch block of wood the length you measured in Step 1, remembering to add 2 to 3 inches. Cut the block down to the width needed with the miter saw. Make sure that you cut the block so that the widths of the block are even (square).
-
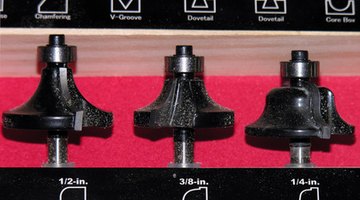
Choose a router bit that will create the decorative edge you want for your corner blocks. Place an end of one block against the fence of the router table and turn on the router. Run the edge through the router blade to create the decorative edge. Push the same edge through one more time to remove imperfections, making sure not to force the wood block through the cutting bit. Rotate the block onto the next side and run the block through the router to complete the decorative edge. The two edges are the only ones that should be decorated.
-
Lightly sand the corner block you made in Step 3 with 120-grit sandpaper. Do not sand the routed area as it may damage the block. Clean the dust off the block with a clean, damp rag.
-
Repeat Steps 2 to 4 for all the corner blocks you need to make.
-
Seal the wood blocks with the same color stain or paint that the crown molding will have once installed. Apply stain with a paint brush, making sure to get the stain or paint into the decorative grooves. Wipe off the stain with a clean, dry rag. Stain the back side of the corner block to seal the wood.
-
Apply paint with a paint brush, with as little paint on the brush as possible. Apply two coats of paint for full coverage, allowing two hours for drying between coats of paint.
Tip
For outside corners, take two corner blocks and cut each at a 45-degree angle. This forms a mitered outside corner when the two pieces are put together. The larger the router bit, the more passes through the router. Make sure that the decorative edge is the same on all of the blocks.
Warning
Routers spin at an average speed of 35,000 rpm, making them very dangerous machines. Always be aware of where your hands are placed and make sure that you have a solid grip on the pieces you are cutting with the router.
The Drip Cap
- Crown molding adds elegance to any room in a home, but is harder to install than other molding types because of the multiple angle cuts required to get a perfect finished product.
- Instead, the molding will butt right up to the corner blocks to form a perfect corner that is easy to install.
- Measure the distance from the ceiling down to the bottom of the crown molding.
- Cut the 4-inch by 4-inch block of wood the length you measured in Step 1, remembering to add 2 to 3 inches.
- Clean the dust off the block with a clean, damp rag.
- Apply stain with a paint brush, making sure to get the stain or paint into the decorative grooves.
References
Writer Bio
Adam Yeomans has been writing professionally since 2010, with his work appearing on websites such as eHow. He works in the construction industry as a builder and as an energy efficiency consultant.
Photo Credits
- router bit s image by Michael Cornelius from Fotolia.com
- router bit s image by Michael Cornelius from Fotolia.com
More Articles


