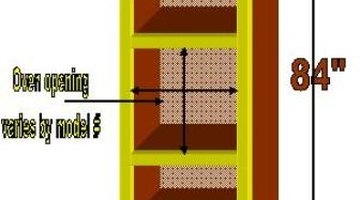
How to Build a Wall Oven Cabinet
One way to get the maximum benefit from an oven is to have one that is installed in a cabinet. Building a wall oven cabinet will vary according to the dimensions of the oven, but there are some basics that are true for every wall oven cabinet that is built.

One way to get the maximum benefit from an oven is to have one that is installed in a cabinet. Building a wall oven cabinet will vary according to the dimensions of the oven, but there are some basics that are true for every wall oven cabinet that is built. They all have storage space above and below the oven that can be customized to user specifications. This article builds a wall-oven cabinet 30-inches wide.
Things You Will Need
- Two end panels, 23-by-84-by-¾-inch plywood
- Two cleats, 4-by-19-by-¾-inch plywood
- 1d box nails
- Four shelves, 23-by-28½-by-¾-inch plywood
- Two shelf supports, 4-by-28½-by-¾-inch plywood
- One back, 30-by-80-by-¼-inch plywood
- Two end face frame pieces, 1-by-2-by-80¾-inch lumber
- Three rails, 1-by-3-by-27-inch lumber
- One bottom rail, 1-by-2-by-27-inch lumber
Tip
An alternative to using corrugated fasteners on the face frame is to glue and clamp them. Use the same steps as above, but clamp them together instead. Pay close attention to sanding the frame where the rails meet the ends.
Warning
Do not leave power tools unattended in the presence of children. Do not paint or stain the wall oven cabinet without proper ventilation.
-
Place the two 84-inch end panels on a worktable. Measure from one end and make a mark at four inches. Repeat this for the perpendicular edge. Place the framing square on the marks and draw lines that will intersect. This will result in a four-inch square at one corner of the plywood. Repeat this on the other piece, and cut the squares out with the skill saw.
-
Apply glue to the area behind the cutouts and secure the 4-by-19-inch pieces with the box nails. Clean up excess glue with a damp cloth.
-
Measure from the top edge of the plywood and make marks at 28 and 73¾ inches. Place the framing square on the marks and draw a line across the width of the end panel. Mark an "X" to the right of the lines, indicating where the shelves will be secured.
-
Apply glue to one long edge of the shelf supports (4-by-28½) and secure them to two of the shelves (23-by-28½) with the drywall screws. These two shelves are the center shelves. Next, apply glue to the 23-inch edges of the shelves, place them on the lines and secure them to the end panels with the finish nails.
-
Turn the wall-oven cabinet over, so the toe-kick cutout is facing down. Apply glue to the edges, and place the 30-by-80-by-¼-inch plywood on the cabinet and secure it with the box nails.
-
Place the two end-face frame pieces (1-by-2-by-80¾) on the worktable with the long edges adjacent to each other. Measure from one end, and make marks at 28 and 73¾ inches. Place the framing square on the marks, and draw a line across the width of the two pieces.
-
Apply glue to the end edges of the bottom rail (1-by-2-by-27-inch lumber) and one of the top rails (1-by-3-by-27-inch lumber). Place the 1-by-2 at the bottom of the cabinet (the toe-kick end) and the other at the opposite end. Secure these pieces with the corrugated fasteners. Clean up excess glue immediately with a damp cloth.
-
Apply glue to the end edges of the remaining rails, and place them on the lines drawn in Step 1 of this section. Secure them with the corrugated fasteners.
-
Turn the wall oven-cabinet over, so the toe kick is facing up. Apply glue to the face edge of the toe-kick cutout, place the 4-by-30-by-¾-inch plywood on it, and secure it with the finish nails. Place the 4-by-4-by-¾-inch block behind the toe kick and secure it to the bottom of the bottom shelf with the drywall screws. Be careful not to puncture through the top of the bottom shelf. Drive two finish nails through the toe kick into this block. This block strengthens the toe kick during installation. Clean up excess glue immediately with a damp cloth.
-
Apply glue to front edges of the wall oven cabinet, and place the face frame on it. Secure the frame to the cabinet with the finish nails. Set all the nail heads, and fill the holes and the frame joints with wood putty. After it dries, sand the cabinet with 100-grit sandpaper.
The Drip Cap
- One way to get the maximum benefit from an oven is to have one that is installed in a cabinet.
- Repeat this for the perpendicular edge.
- This will result in a four-inch square at one corner of the plywood.
- Apply glue to the area behind the cutouts and secure the 4-by-19-inch pieces with the box nails.
- Turn the wall-oven cabinet over, so the toe-kick cutout is facing down.
- Apply glue to the edges, and place the 30-by-80-by-¼-inch plywood on the cabinet and secure it with the box nails.
- Place the framing square on the marks, and draw a line across the width of the two pieces.
- Secure these pieces with the corrugated fasteners.
- Clean up excess glue immediately with a damp cloth.
References
Writer Bio
Michael Straessle has written professionally about the construction industry since 1988. He authored “What a Strange Little Man,” among other books, and his work has appeared in various online publications. Straessle earned a Bachelor of Arts from the University of Arkansas at Little Rock in professional/technical writing.
Photo Credits
- Image by Michael Straessle
- Image by Michael Straessle
More Articles


