
How to Paint a Tie Dye Room

A signature style of the 1960s, tie-dye designs infuse T-shirts, artwork and other items with a colorful retro appeal. It is possible to translate that same artistic feeling into your home decor.

Things You Will Need
- 3 colors of enamel paint, eggshell finish (you can opt to add a semigloss to one of the colors)
- Latex gloves
- Painting trays
- Sponge (optional)
- Drop cloths
- Protective face mask
- Old rags or cloths
- Rubber bands
Tip
It is best to attempt this technique on a piece of scrap drywall and see your tie-dye pattern prior to working on walls. Look through tie-dye wallpaper samples and gather color schemes and ideas before application.
By using a three-color painting method and some old rags, you will be able to completely cover your walls with tie-dye flair.
-
Paint your room with the primary color within your tie-dye pattern. For example, if your tie-dye includes white, green and blue, it is best to paint the room white and do the faux tie-dye in green and blue. Allow 24 hours for the room to completely dry.
-
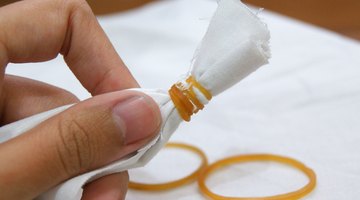
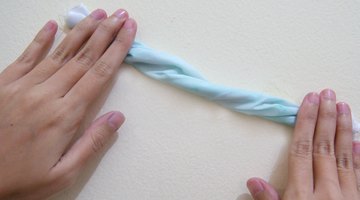
Twist your cloths or rags lengthwise. Secure the twisted fabric with rubber bands at each end. Make sure the bands are securely fastened to keep the rolls from opening once inserted into the paint. It is best to use two different cloth lengths to avoid full coverage over each layer. For example, you can use an 8-inch-long cloth for your second color and a 4-inch-long cloth for your third color.
-
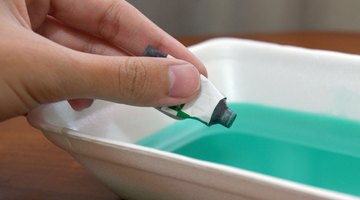
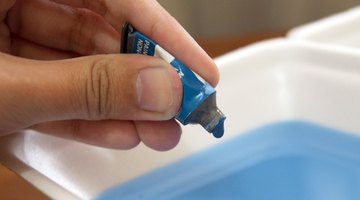
Mix one of your secondary paints, and pour into paint tray. Have sufficient drop cloths in case of a spill during paint application.
-
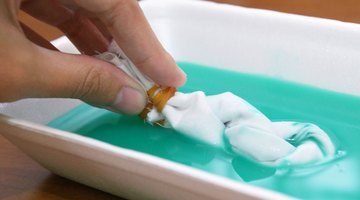
Dip a rolled cloth into the paint tray. Retwist the cloth, and allow the excess paint to drip into the tray before applying directly to the walls.
-
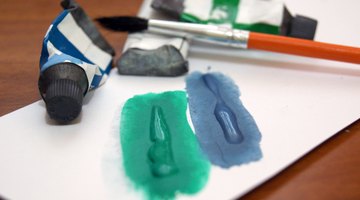
Roll your twisted fabric lightly in an upwards and sideways motion. The twists in your fabric will create a tie-dye effect. It is important to not saturate the wall so that the base color shows through. Cover your whole room with the secondary color. You can opt to cover the wall one section at a time, such as covering a 4-by-4-foot area. However, you run the risk of having uneven dry lines throughout the wall. Allow this layer to dry approximately 24 hours prior to adding the last paint layer.
-
Mix your third color, and pour into a paint tray. Roll a new piece of twisted fabric into the third color. Examine your walls as you work, and remove excess paint with your sponge.
-
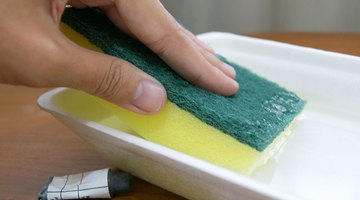
Pour your base color paint into a separate paint tray and dip an unused sponge into it. Allow the excess paint to drip into the tray. You do not have to wait until the third layer is completely dry. Lightly sponge the color onto the walls in a random pattern to highlight the base color throughout the design. You can opt to cut out your sponge in a particular shape such as a flower or ring, and apply it as a motif in a random pattern throughout the room to highlight the base color. Allow your room to dry for approximately 24 hours.
References
- "Tie Dye! The How-To Book"; Virginia Gleser; 1999
Resources
Writer Bio
Mercedes Valladares is the founder of M721Organics and has been an independent designer for over 15 years. Her work experience commenced during college with manufacturers based in New York and Hong Kong. Her education includes LIM College, International Fine Arts College and design certification from the Paris Fashion Institute. She produces eco-crafting videos and writes recycling articles online.
Photo Credits
- Carla de Koning /Demand Media
- Carla de Koning /Demand Media
- Carla de Koning /Demand Media
- Carla de Koning /Demand Media
- Carla de Koning /Demand Media
- Carla de Koning /Demand Media
- Carla de Koning /Demand Media
- Carla de Koning /Demand Media
- Carla de Koning /Demand Media
More Articles