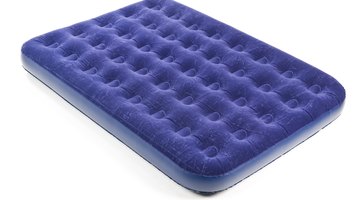
How to Stop Air Leaks in an Air Mattress
To fix an air mattress leak, first locate the leak. Then, choose from one of many methods to repair the leak: use an inner-tube repair kit, use rubber cement, or tent sealer.

Air mattresses are an ideal alternative to sleeping on the ground when you go camping, but they are also handy for home use as additional sleeping space for company or sleepovers. But while they are an inexpensive alternative to a traditional mattress, they are prone to small holes and air leaks. Fixing the leak can be a straightforward process but the trick is finding it. There are several methods to finding and fixing leaks, and the degree of difficulty for each method varies. Start with the easiest solution possible, and if one doesn't work, try the next solution.
Things You Will Need
- Bubble soap or dish detergent
- Felt pen
- Tape
- Inner-tube patch kit
- Marine Goop
- Rubber gloves
- Small paint brush
- Rubber cement
Tip
Test the mattress for air-tightness before you take it camping. Take repair items with you on camping trips to make on-site repairs. Always mark a puncture as soon as you find it. If the leak is on a fabric surface, gently sand away some of the fabric with a fine grit sandpaper to make the patch adhere more effectively.
Warning
Use simpler methods to find a leak and avoid submerging the mattress in water if possible. Valve stem leaks cannot usually be mended and you may have to replace the mattress.
Find The Leak
-
Inflate the mattress and apply pressure to the surface. Listen for escaping air. Focus on the seams and the valve stem first.
-
Find the air leak by wetting your forearm and slowly moving it around the mattress while applying pressure to the air bed. You will notice any escaping air against your skin.
-
Spray or wipe the outside of the mattress with bubble soap (used for blowing bubbles) and watch for bubbles. Use dish detergent mixed with a little water as an alternative.
-
Submerge the mattress in water. Watch for bubbles rising to the top and follow the bubbles to the leak. Mark the hole with a felt pen or a piece of tape. Let the mattress dry thoroughly.
Fix The Leak
-
Deflate the air mattress. Repair a surface leak using an inner-tube repair kit. Place the repair pad over the hole and apply glue around the edges and press to the mattress. Apply glue to the patch and place the patch over the pad. Glue around the edges of the patch to form a tight bond.
-
Apply Marine Goop to the leak using a brush to apply -- wear rubber gloves to work with the sealant. Coat the hole with 1/16 inch of the Goop. Allow to dry thoroughly (preferably 48 hours) before refilling the mattress.
-
Apply rubber cement to the leak. Allow to dry for several hours before refilling the mattress.
-
Repair a seam leak by applying rubber cement or tent sealer. Allow to dry overnight for a better seal. Fix a larger seam leak by releasing the air from the mattress, then seal the seam with adhesive from a mattress repair kit or inner-tube repair kit. Let the adhesive set up thoroughly. Apply a patch over the site of the leak and the seam; make sure all edges seal completely to form a tight bond. Run your fingers along the edges during the drying time to ensure the bond stays intact.
The Drip Cap
- Air mattresses are an ideal alternative to sleeping on the ground when you go camping, but they are also handy for home use as additional sleeping space for company or sleepovers.
- There are several methods to finding and fixing leaks, and the degree of difficulty for each method varies.
- You will notice any escaping air against your skin.
- Use dish detergent mixed with a little water as an alternative.
- Place the repair pad over the hole and apply glue around the edges and press to the mattress.
- Allow to dry overnight for a better seal.
- Fix a larger seam leak by releasing the air from the mattress, then seal the seam with adhesive from a mattress repair kit or inner-tube repair kit.
References
Writer Bio
Tammy Parks began writing professionally in 2009. She has extensive experience writing online, and her work has appeared on various websites. Parks doesn't have a particular specialty, instead preferring to write about lots of different topics. Parks attended Black Hills State University where she studied marketing, mass communications and literature.
More Articles


