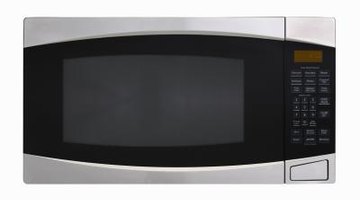
How to Install a 30-Inch Over-the-Range Microwave Under 36-Inch Cabinets
Installing a microwave over-the-range is a great solution where space is limited. Typically, the microwave you install is the same length as the cabinet under which you are going to install it. Sometimes the microwave may be smaller than the cabinets, however, so you have to decide the best way to install it. When the microwave is not as long as the cabinet is wide, you will want to center it for a uniform appearance.

Step 1
Turn the power off at the breaker box for the kitchen circuit. Pull the stove away from the wall where you will install the microwave. Measure in three inches from each side of the cabinet using the tape measure and mark the measurements on the wall using a pencil. This will center the mounting template under the cabinet. Locate the studs in the wall in the area where you will mount the microwave using a stud finder. Mark the stud locations on the wall using a pencil.
Step 2
Place the mounting template for the microwave on the wall and center it under the cabinet using the marks you made so that there is three inches on each side. Try to line up the template so the mounting screws will all go into studs. In places where the mounting hardware will not go into a stud, you must use a toggle anchor. Mark the locations of the holes you will need to drill as shown on the template using a pencil.
Step 3
Drill the holes in the locations that you marked using a drill and drill bit. Note that holes for the toggle anchors must be large enough to insert the toggle anchors. Drill the holes into the cabinet bottom for the screws that will mount the microwave to the cabinet and for the electrical wires using a drill and drill bit. Install the mounting bracket on the wall and secure it using the hardware that came with the bracket using a Phillips screwdriver.
Step 4
Lift the microwave up to the mounting bracket with a helper since the microwave will be too heavy to lift into place and mount alone. Push the electrical wire through the opening and into the cabinet as you lift the microwave to the bracket. Connect the microwave to the mounting bracket and have your helper support it. Install the screws through the cabinet bottom and into the top of the microwave using a Phillips screwdriver.
Step 5
Connect the electrical wires from the microwave to the kitchen circuit. Red or black is the hot wire, white or gray is neutral and the ground wire will be either green or a bare wire. Connect the wires according to color and install wire nuts on the splices. Wrap electrical tape around the wire nuts to prevent them from accidently coming off the wires. Install the charcoal filter into the bottom of the microwave.
Step 6
Push the stove into place against the wall. Turn the power on for the kitchen circuit and program the microwave according to manufacturer instructions.
References
Warnings
- Do not attempt to connect the microwave wires to the kitchen circuit when the power is still on.
Writer Bio
John Rose has been writing professionally since 1981. Now contributing to various online publications, he specializes in auto repair, home maintenance and similar topics. Rose studied English at Frostburg State University.
Photo Credits
- Ryan McVay/Photodisc/Getty Images
More Articles
- Opening Size for a 27-Inch Wall Oven
- What Is a Microhood Microwave?
- How to Replace the Light Bulb in an Amana Radarange Microwave Oven
- How to Replace a Power Cord for a Dishwasher
- Installation Instructions for a Glacier Bay Surface Mount Mirrored Medicine Cabinet
- How to Remove a Thermador MBBS from a SMW272


