
Homemade Vacuum Kiln

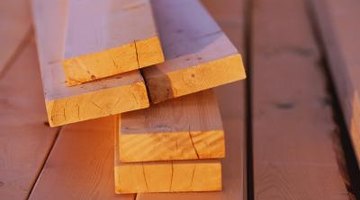
Lumber that's not dried properly is prone to warping and shrinking. Particularly when used indoors -- where the air is kept dry for comfort -- insufficiently dried wood will continue to dry over a long period of time. As it dries it will shrink, causing a multitude of problems, depending on where the wood is installed and on its purpose. Improperly dried wood may also rot or degrade more easily, because the drying process kills infestations. Lumber may be dried in heated kilns, or in vacuum kilns. Many woodworkers find it more convenient to purchase pre-dried wood as needed, but if you can purchase green wood for a very low price, you may find it worth your while to make a vacuum kiln.
Accruing Kiln Supplies
To make your own vacuum kiln, you'll gather most of your supplies from a hardware store. Materials such as a large plastic drain pipe, copper tubing and silicon sealer are all standard, easy-to-obtain items. Other materials, such as a vacuum pump, may not be so easy. Call local universities or auto wreckers about a vacuum pump, or look online. A vacuum gauge, manometer and ball valve may be found at refrigeration or plumbing suppliers. Also, if you don't already have one, you can purchase a moisture meter from a woodworking supply store.
Kiln Tube
The kiln tube will be made from a piece of 12-foot long, 12-inch plastic pipe. Shop around for a 12-inch frying pan with a glass lid to create the end caps for the vacuum. Remove the pan's handle and seal the pan onto one end of the pipe with a rubber seal and silicone. When you're ready to use the kiln, you'll install the wood you wish to dry into the tube, then you'll seal the other end of the kiln with the glass lid for the frying pan. Attach the glass lid to the pipe with silicon sealer, then cut the seal with a utility knife after drying is complete. Drill two small holes toward one end of the kiln tube to connect a moisture meter to the pipe.
Vacuum Pump
The vacuum pump will be connected to the kiln tube via plastic plumber's pipe. There should be a valve on the pipe so you can cut off the vacuum from the kiln tube. Drill a hole into the kiln tube large enough to hold the pipe from the pump. Use pipe glue to connect the pipe to the tube. Add a T junction at the compressor-end of the pipe, and connect the compressor to the T junction with flexible tubing. Seal seams between the flexible tubing and the compressor with silicon sealer. Insert a T junction into the pipe near the vacuum, and insert a manometer or vacuum gauge into the T junction.
Moisture Meter
Strip the insulation from a small segment of the the moisture meter wires where the wires will be touching the kiln tube. Insert the wires into the two holes you drilled in the kiln tube. Seal the wire and the hole with silicon sealer.
Using the Kiln
Run the vacuum pump for about 24 hours, then shut the valves and turn off the vacuum. Leave the vacuum off for about 48 hours, then run the vacuum pump again for eight to 12 hours. Keep checking the moisture content on the moisture meter. Once the moisture meter reads about 10 percent, you can remove your wood and let it acclimate.
Writer Bio
Leslie Rose has been a freelance writer publishing with Demand Studios since 2008. In addition to her work as a writer, she is an accomplished painter and experienced art teacher. She has a Bachelor of Arts degree in art with a minor in English.
Photo Credits
- Stockbyte/Stockbyte/Getty Images
More Articles